By now, you probably realize that alcohol is off-limits during the elimination phase of the Autoimmune Protocol… but you are likely wondering about the real whys behind it. How are you possibly going to manage family functions, social events, the holidays, and those casual after-work drinks without feeling awkward?

This post will cover the science behind why alcohol is paused, my take on managing social life, and how to navigate this phase without isolating yourself. If you haven’t already seen my post on Surviving Social Life on the AIP, make that your next stop. Whatever you do, don’t isolate yourself just because the AIP can be hard. You’re strong, and you can do hard things—you’ve got this!

Why is Alcohol Out on the AIP?

So, what’s the real deal about alcohol? So many health gurus tout it as “good for your health”—especially wine! So why do we need to avoid it on the AIP?

(Note: Whether you are following Core AIP or the Modified AIP track, recreational alcohol—beer, wine, and spirits—is eliminated across the board during the elimination phase. For a full breakdown on tricky food guidelines, check out Autoimmune Wellness’s What’s In, What’s Out on AIP.)

When you are focused on healing your gut and calming a dysregulated immune system, alcohol causes a few major disruptions under the hood:

  • It Unravels the Gut Lining: Alcohol directly breaks down the “tight junctions” (the glue) holding your intestinal cells together. This creates gaps in the gut barrier, allowing unabsorbed food particles and toxins to pass directly into your blood.

  • It Feeds Toxic Bacteria: Alcohol acts as food for opportunistic, gram-negative bacteria (like E. coli). This feeds bacterial overgrowth in the digestive tract and releases endotoxins into your system, which triggers systemic inflammation and taxes your liver.

  • It Causes Direct Mucosal Damage: Even small amounts of alcohol cause physical irritation and tissue breakdown at the tips of the tiny villi lining your small intestine—damage similar to what gluten exposure causes in celiac disease.

Why This Matters Even More for Autoimmune Conditions

If you have an autoimmune disease, your genetics make you naturally more susceptible to leaky gut and an exaggerated immune response to anything that leaks into your bloodstream. Eliminating substances that tear down the gut lining is essential to break the inflammation loop and give your digestive system a real chance to recover.

What About Cooking or Fermented Foods?

There is a big difference between drinking a glass of booze and using a splash of wine in a recipe!

  • Cooking with Alcohol: Using wine or grain-free spirits in hot, cooked dishes (where the alcohol burns off during cooking) is completely fine during the elimination phase.

  • Homemade Fermented Drinks: Small, naturally occurring trace amounts of alcohol found in homemade fermented beverages (like kombucha or water kefir) are often well-tolerated by most people during elimination.

Will I Ever Be Able to Drink Alcohol Again? 

The elimination phase of the AIP is temporary—it is a reset, not a permanent sentence.

However, in reality, most people on the AIP choose to consume alcohol very rarely (if at all) even long after the elimination phase is over. Once your gut has healed, some individuals choose to test small amounts of grain-free alcohol (like a high-quality red wine or clean tequila) during reintroductions. But many find that their body simply feels so much better, sleeps deeper, and stays flare-free without it.

If you do choose to reintroduce it down the road, it is best kept as a rare, occasional treat rather than a weekly habit.

My Two Cents on Alcohol and The AIP

I’ve taken a lot of questions from distraught community members about this topic, so I want to share a few personal reminders to keep this all in perspective. Trust me, you are not alone, this is not the end of the world, and you will get through this too!

  • It disrupts critical healing sleep: While alcohol might help you fall asleep initially, it fragments sleep cycles later in the night, suppressing REM sleep and causing a cortisol spike. Since deep sleep is when your immune system does its heaviest repair work, skipping booze protects your body’s natural nightly healing process.
  • Examine your emotional relationship with alcohol: Beyond the physical gut science, take a step back to look at the psychological side of drinking. For many of us, booze isn’t just a liquid in a glass—it’s tied to winding down after a hard day, soothing social anxiety, or celebrating. For a wonderful deep dive into this mindset, read Autoimmune Wellness’s article on Understanding Your Social & Emotional Relationship With Alcohol.
  • You are not the first person to say no to a drink: Think about people who don’t drink for fitness goals, religious reasons, health conditions, or personal choice. In fact, choosing to pass on alcohol is more normal than ever—Gallup reports that only 50% of young adults (ages 18–34) drink today, down from 72% two decades ago. Don’t feel awkward about sticking to your healing plan; you are part of a growing cultural shift toward health and mindfulness.
  • “Don’t Be Weird!”: As Angie Alt famously shares on Autoimmune Wellness, “Don’t be weird!” If you act with confidence and don’t make a big deal out of not drinking, no one else will either. When it comes time to order, simply ask for a mocktail or non-alcoholic sparkling beverage without missing a beat. If asked, a simple “I’m taking a break from alcohol right now” is usually all it takes!
  • Failing to plan is planning to fail: Set yourself up for success! Think in advance about how you’ll handle social situations. For a deeper dive into managing gatherings, check out my post on Surviving Social Life on the AIP.
  • The Bartender Strategy: If you’re attending a restaurant or work event, try arriving a few minutes early to speak with the bartender. Order a mocktail or a sparkling water with a lime wedge served in a fancy glass. No one questions what is in your glass, and you get to enjoy a festive drink without creating a conversation about why you aren’t drinking.

Take Me To The Mocktails!

Looking for great, delicious AIP-compliant drinks so you never feel left out at a party?

Skip the commercial store-bought mocktails (which are often loaded with non-compliant sugars, seed-based bitters, or additives) and stick to homemade recipes!

We have tons of incredible, community-tested recipes posted directly in our Facebook Group. Simply head over to the group and use the search bar for terms like “mocktail,” “beverage,” or specific drink names like “lemonade,” “iced tea,” or “mule.” You can also search our group hashtag #thirstythursday to scroll through our favorite festive creations!

Bonus Tip: AIP-compliant mocktails aren’t just fun—they can actually support digestion! Enjoying a tart or bitter sparkling drink (like soda water with fresh lime or a splash of unsweetened tar cherry or cranberry juice) 15-20 minutes before meals acts as an ancestral aperitif. It stimulates stomach acid and digestive enzymes, helping your body break down nutrients better without any of the gut damage from alcohol!

With the holiday season creeping up, I thought it was about time that I finally compile this very important FAQ post on what to do if you’ve been glutened while on the AIP. 

If you’re here because you’ve been contemplating just how bad it would be to cheat on the AIP this holiday season or for a special event (completely different than someone dealing with celiac disease or non-celiac gluten sensitivity), stick around until the end of the post where I’ll touch on that too. But first, let’s talk about what happens when the gluten was UNintentional.

While I’m hopeful you’re making good decisions and choosing food wisely for your healing journey, I know all too well that sometimes, as careful as we are, it happens – we get glutened!

It’s especially challenging if we’re eating at a restaurant, or even at friends’ and families’ homes. Cross-contamination happens, ingredients get overlooked, or someone thinks they know what is gluten free and … well, they don’t. 

It happens.

The BEST advice I can give is:

DON’T PANIC!

I know … easier said than done! But stressing about the situation isn’t going to undo what happened, and piling a whole lot of anxiety on top of an already unhappy digestive system isn’t going to make you feel any better.

Try to remain calm and focus on taking care of yourself.

FACT:  Feeling emotionally stressed can compound the physical reactions you might have when gluten gets into your system. According to the Mayo Clinic, stress can affect your body in many ways, including causing symptoms such as stomach pain that overlap and amplify possible physical symptoms of gluten consumption.
– Source: Gluten.org

Hidden Names for Gluten: What to Watch For

One of the easiest ways unintentional gluten exposure happens is through tricky ingredient labels. Manufacturers rarely list “gluten” plainly on a package. Instead, it hides behind technical terms, derivatives, and cross-contaminated ingredients.

Important Note on AIP vs. Gluten-Free:

The list below is specifically designed to help you spot gluten and gluten-containing ingredients. Keep in mind that just because an ingredient isn’t on this list doesn’t mean it’s automatically AIP-compliant. Many gluten-free grains, starches, and nightshade-based additives are still eliminated during the strict AIP phase. Use this guide strictly as a filter to detect hidden gluten.

To help you spot these hidden culprits, here’s a breakdown of ingredients to watch out for:

1. Standard Grains & Primary Sources

Barley (including barley malt, barley flour, and barley extract), Rye, Wheat (and all varieties like spelt, kamut, farro, durum, einkorn, and emmer), Triticale (a cross between wheat and rye)

2. Wheat Derivatives & Technical Names

Atta (whole wheat flour common in South Asian cooking), Bulgur, Couscous, Farina, and Semolina, Fu (dried wheat gluten used in Asian cuisine), Graham flour & Maida, Matzo / Matzo meal, Seitan (pure wheat gluten used as a meat substitute), Udon (wheat-based noodles), Wheat berries, wheat germ, and wheat starch (unless explicitly certified gluten-free)

3. Hidden Additives & Processing Agents

Brewer’s yeast (a beer-brewing byproduct containing barley; note that standard baker’s yeast for baking is typically gluten-free), Hydrolyzed wheat protein, Malt (malt syrup, malt extract, malt flavorings, and malt vinegar), Modified food starch (if source grain isn’t listed, assume wheat outside strict GF labeling zones), Smoke flavoring (frequently uses barley malt as a carrier), Textured vegetable protein (TVP) (often wheat-derived unless specified as soy or pea)

4. Ingredients Requiring Double-Checking

Oats / Oat flour (naturally gluten-free, but highly prone to severe cross-contamination during harvesting and processing unless labeled Certified Gluten-Free), Soy sauce / Teriyaki sauce (traditionally brewed with wheat unless labeled tamari or gluten-free), Yeast extract / Autolyzed yeast extract (frequently made from spent brewer’s yeast, so verify the source or look for a gluten-free label)

How do you know if you’ve been “Glutened?” 

Unfortunately, there isn’t one universal “I’ve been glutened” reaction.

Some people know almost immediately that something is wrong. Others don’t notice anything until later. And some people have mostly digestive symptoms while others may experience headaches, fatigue, joint pain, brain fog or skin problems.

Some common reactions to gluten exposure include:

  • Constipation
  • Diarrhea
  • Vomiting
  • Nausea
  • Abdominal pain
  • Numbness
  • Bloating
  • Gas
  • Headaches / Migraines
  • Brain fog
  • Mood swings
  • Anxiety
  • Depression
  • Joint pain
  • Fatigue
  • Insomnia
  • Skin issues / Rashes / Mouth Ulcers

You may experience several of these symptoms, or only one or two. You may also have symptoms that aren’t on this list at all.

Over time, you’ll probably get to know your own particular “glutened” symptoms. I think that’s actually pretty useful information to have especially if you aren’t sure what has caused a flare of symptoms.

One important thing to remember … symptoms don’t necessarily tell you what’s happening inside your gut. Someone with celiac disease, for example, may have an immune reaction to gluten without having a dramatic set of symptoms. It’s highly individual.

Before You Get Glutened: Be Prepared

Preparation is always key!

As someone living with food sensitivities and/or allergies, having a plan in place before you need it can make a bad situation a little easier to deal with.

I recommend talking to your healthcare professional BEFORE you’re in a situation where you’ve been glutened. That way you know what protocol is right for YOU, particularly if you have celiac disease or another condition that requires specific medical care.

I also think it’s worth having a few simple things on hand that you know you tolerate and that may help you manage some of the symptoms if an exposure happens.

  1. Hydration & Electrolytes
    This isn’t particularly exciting advice, but it’s probably one of the first things I’d focus on.
    If you’re dealing with diarrhea or vomiting, you’re losing fluids, and replacing those fluids is important. Water is fine, and an electrolyte drink can be useful if you’re losing a lot of fluid. 
    If you’re nauseated … tiny sips are easier to manage.
  2. Digestive Enzymes
    You may have seen digestive enzymes recommended for accidental gluten exposure, particularly in natural health and wellness and AIP circles. I see this suggestion come up quite often, and some people say they really do feel better when they take them.
    There is, however, an important distinction between something that makes a person feel better and something that has been shown to break down enough gluten to prevent a reaction.
    The Celiac Disease Foundation does not consider commercially available digestive enzyme products a reliable way to digest gluten, and Autoimmune Wellness mentions the same issue in their Gluten Exposure: A Healing Guide.
    So while this is something you may hear recommended, I wouldn’t rely on digestive enzymes as protection against gluten. And they definitely aren’t a green light to intentionally eat gluten.
  3. Herbal Tea
    This is one of those simple things that can be worth having around.
    Peppermint, chamomile and ginger tea may help with particular symptoms such as nausea, gas or digestive discomfort. They aren’t going to remove gluten from your system, but if a warm cup of tea makes your stomach feel a little less angry, I’m all for it. Sometimes simple is good.
  4. Keep Your Diet Simple
    If you’re feeling nauseated, you don’t have to force yourself to eat, but when you’re ready, keep it simple! Stick with foods you already know you tolerate well. Chicken soup (without too much fat), broth, and well-cooked vegetables. Consider avoiding dairy and sugar, even if you are no longer in the AIP elimination phase.
  5. Activated Charcoal
    You’ll find differing opinions on this one. Activated charcoal is sometimes recommended by natural practitioners, and I’ve personally used it for stomach upset and found some relief. 
    The Celiac Disease Foundation, however, does not recommend activated charcoal for gluten exposure, and there are some good reasons for caution, as it can interfere with absorption of medications and supplements and cause constipation. Talk to your healthcare professional to decide what’s right for you.
  6. Rest
    Getting glutened can leave you feeling like you were hit by a truck. Prioritize as much rest as possible. Give yourself permission to have a quiet day or two.

What To Do After You’ve Been Glutened

Once the accidental exposure has happened, there isn’t a magic way to get the gluten back out. Thankfully though, you’ve prepared for such an unfortunate event if you followed the advice above.

The best thing you can do is: stop the exposure, take care of yourself and give your body some time to deal with the aftermath.

Focus on fluids, rest and foods you know you tolerate. Use simple things that may help with the particular symptoms you’re experiencing, rather than feeling like you need to throw every supplement in your cupboard at the problem.

And don’t forget that you don’t necessarily need to do anything.

Sometimes you just need to wait it out.

Autoimmune Wellness has a great article on this topic, Gluten Exposure: A Healing Guide, which goes into much more detail about dealing with the aftermath of an exposure.

How Long Will It Take to Feel Better?

That’s the million dollar question everyone wants the answer to!

Unfortunately, there isn’t a magic number of hours or days. It’s highly individual and depends on a number of factors.

How long you’ll feel lousy after gluten exposure can vary quite a bit from one person to another. Current research into accidental gluten exposure in people with celiac disease also shows considerable variation in people’s symptoms and how long those symptoms affect their day-to-day lives.

So if someone else tells you they felt completely fine the next morning while you’re still curled up on the couch a couple of days later, don’t assume you’re doing something wrong.

Your reaction may simply be different.

And there’s another distinction that’s important here. Feeling better isn’t necessarily the same thing as your gut being completely healed. For someone with celiac disease, gluten triggers an immune response that can damage the small intestine, and intestinal healing takes place over time with a strict gluten-free diet.

In other words, don’t judge what’s happening inside your gut solely by how you feel on the outside.

If your symptoms are severe, continue to worsen, aren’t improving, or you’re unable to keep fluids down, it’s time to check in with your healthcare provider.

Do I Need to Start the AIP Over?

The short answer … No!

If you’ve been following the AIP and accidentally consumed gluten, you do not need to go back to Day One and start the entire elimination phase over again.

Take a breath, get back to your usual AIP elimination diet and keep going.

Maybe there’s something you can learn from the experience. Ask more questions at a restaurant. Double-check a label. Bring your own food to a family gathering. (See my posts: Dining Out on the AIP and Surviving Social Life on the AIP for more tips and tricks)

But don’t beat yourself up over an accident. One exposure does not erase all the work you’ve done.

What About Cheating on the AIP?

That’s a different question.

Accidentally eating gluten and deliberately choosing to eat gluten for a special occasion aren’t the same thing (I do get this question frequently, so I’ve written about that too.)

If you’re considering intentionally stepping outside the parameters of the AIP diet for a holiday celebration, birthday, vacation or other event, check out my FAQ: Can I Cheat on the AIP? for my thoughts on that.

For now, if you’ve been accidentally glutened, take a breath, take care of yourself and get back to the AIP … slow and steady.

Food Storage 101: Batch Cooking, Glass Safety & Toxin-Free Tools

This post contains affiliate links.  Click here to see what that means.

When you’re on the AIP, you’re likely doing a lot more cooking than usual. Whether you’re batch cooking or meal prepping for the week or simply saving leftovers from dinner, what’s the best way to store all of this delicious, healing food? Does it matter what containers we use? Need the 4-1-1 on food storage basics? You’ve come to the right place!

Since we’re trying to live a toxin-free life on the AIP to give our bodies the fighting chance they need to heal, it’s a good idea to consider what you’re using for food storage. There are a lot of opinions out there about plastics, BPA-free options, silicone, and more (read more about why we should avoid plastics here). For me, I kick it old school as much as possible: zero waste, sustainable living, loveable, reusable glass, and non-toxic alternatives!

Storage Planning Tips

  • Pace yourself: Before there’s food to be stored, there’s food to prep, so I offer this tip from personal experience. Extra cooking can be exhausting—especially in the beginning when you’re really not feeling well. So, my top tip is to try to pick days when you’re feeling up to making extra. Better yet, have a friend or family member jump in to help tag-team it. You can work together to create a bunch of delicious options so that you both go home with food to stock your fridge and freezer. Many hands make light work!

  • Don’t outpace your storage space: I’ve done this before when feeling super ambitious: I cooked way more than I needed for a week or two and found my fridge stuffed to the brim. Evaluate the space you have in both your fridge and freezer before you start, and be sure to choose recipes that are freezer friendly if that’s where you plan to store them.

  • Have your containers ready: There’s nothing worse than finishing a big batch cook and then scrambling to find suitable food storage. If you can’t afford to buy new containers, save glass jars from store-bought items or check a local thrift store. If you score secondhand jars, your only investment will be buying new lids.

Zero Waste Storage Containers Freezer Storage AIP

Choosing Your Non-Toxic Storage Tools

Glass is the gold standard for non-toxic food storage, but it isn’t your only option … especially when freezer space or shatter-risks come into play.

  • Glass Jars & Shallow Containers: The classic favorite. Glass jars are wonderful for single-portion liquids, while shallow glass dishes are ideal for solid meals (like shepherd’s pie or roasted root vegetables). Glass holds heat and cold well, but takes a few special precautions to freeze safely without cracking.

  • Quality Silicone Stand-Up Bags (e.g., Stasher): A flexible, leakproof, platinum-silicone alternative to plastic freezer bags. Perfect for flat-freezing “freezer-dump” meal prep ingredients, cooked meats, or roasted veggies to maximize vertical freezer space.

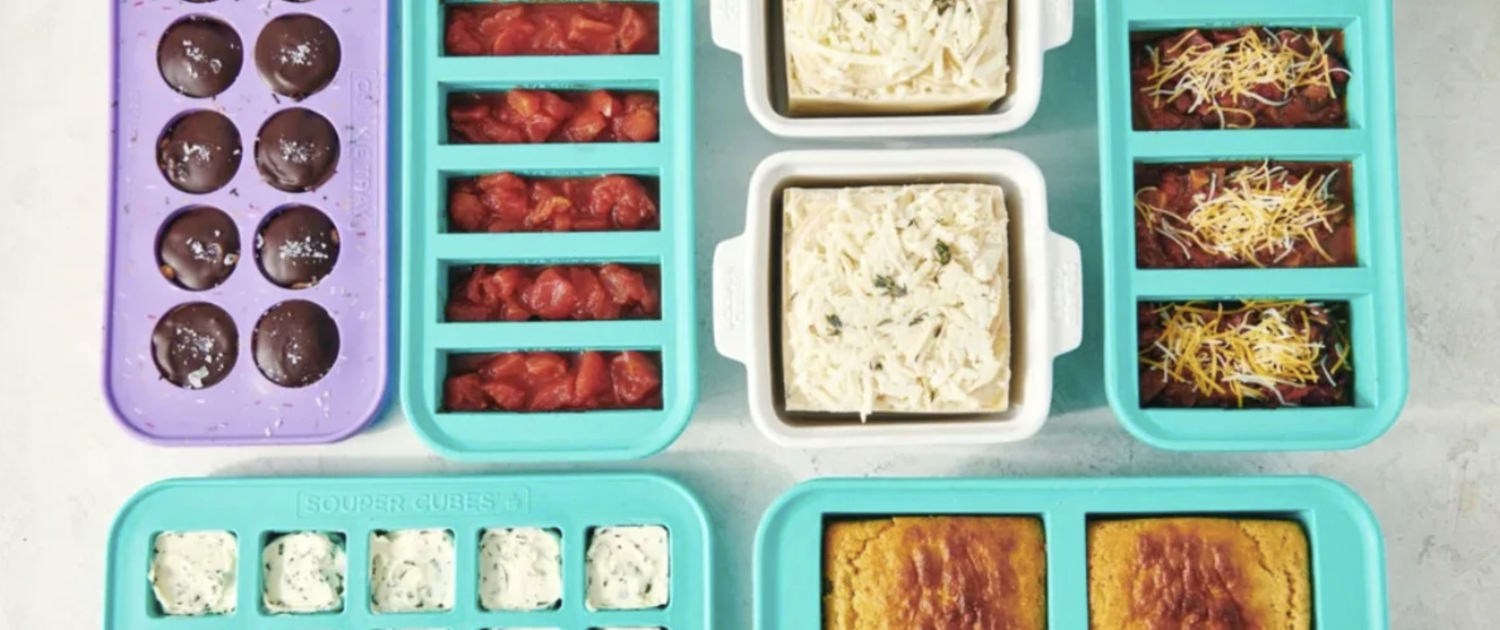
  • Silicone Trays & Portioners (e.g., Souper Cubes): Hands down the most versatile addition to an AIP kitchen! Food-grade silicone trays allow you to pre-freeze portioned amounts of bone broth, stews, purees, and pestos. They feature measured fill-lines (like 1/2 cup, 1 cup, or 2 cups) so you can easily pop out exact portions into longer-term storage without thawing a whole batch.

  • Stainless Steel Containers with Silicone Lids: Yes, stainless steel is a total game-changer for the freezer! Food-grade metal is 100% shatterproof, non-toxic, and lightweight. Because metal conducts cold quickly, food freezes faster—which reduces ice crystal formation and protects your food from freezer burn. It completely eliminates the fear of dropping a frozen container on the kitchen floor!

How to Safely Freeze in Glass Jars

AIP Food storage, glass jar, pesto

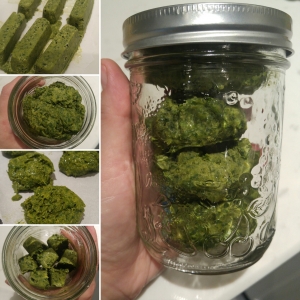
My favorite wide mouth jars with frozen pesto cubes!

Now, you may have heard horror stories of glass jars shattering in the freezer. I had heard stories too, but was always fortunate enough not to have any issues… leave enough space at the top of the jar for expansion and you’re good to go! Right? No … not always!

Eventually, my luck ran out, and tears were shed over bone broth lost. The truth is, at that point I was a newbie to all this and I was using the wrong jars. Even if you leave headspace, you can still have jars crack—not just during freezing, but even during the thawing process! My exposed quick-freezing coils didn’t help either, making thermal shock a real risk.

Fortunately for you, I’ve made the mistakes so you don’t have to!

  1. Use Wide-Mouth, Straight-Sided Jars: Avoid tall, skinny jars or jars with “shoulders” (where the jar curves inward near the top). As liquid expands upward, curved shoulders trap the pressure and crack the glass.

  2. Leave Room for Expansion: Fill jars only 3/4 full to ensure liquid has plenty of room to expand upward as it freezes.

  3. Cool Completely First: NEVER put warm liquids straight into the freezer. Let cooked food cool completely on the counter, then chill it in the refrigerator overnight before moving it to the freezer.

  4. Freeze Upright: Always freeze jars standing straight up.

  5. Protect from Freezer Coils: If your upright freezer has bare cooling coils on the shelves, place your jars inside a shallow plastic bin as a barrier for a few hours or over night. This reduces thermal shock and catches spills if a jar ever does break.

  6. Thaw Slow & Steady: NEVER try to thaw glass quickly or place frozen jars straight into hot water. Move frozen jars to the refrigerator 24 hours before you need them to thaw slowly and safely.

The Game-Changer Hack: Pre-Freezing & Souper Cubes

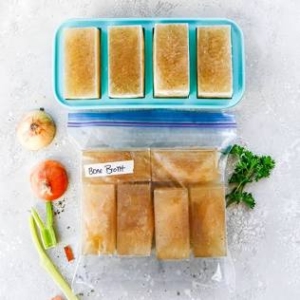
Souper Cubes make freezing bone broth souper easy!

If you want to eliminate the risk of cracking glass entirely, the pre-freezing method is the absolute best way to go!

Instead of pouring liquids directly into jars, pre-freeze your liquids in Souper Cubes trays first. Once frozen solid, pop the blocks out and transfer them into re-usable silicone Stasher bags – easy peasy!

Souper Cubes are an absolute game-changer for AIP batch cooking – not just broths and soups, but all kinds of meal prep options:

  • Food-Grade & Toxin-Free: Made from 100% food-grade, BPA-free silicone with a sturdy rim so they don’t flop around when full.

  • Measured Fill Lines: They come in segment sizes like 1/2-cup, 1-cup, and 2-cup portions.

  • Portion Control: Think about how often you only need a single cup of bone broth for a quick pan sauce or a stir-fry! Pre-portioning means you never have to thaw a full quart jar just for a few spoonfuls.

AIP Food Storage Basics - Souper Cubes are a game changer for batch cooking and meal prepping! aiprecipecollection.comPreventing Freezer Burn

Freezer burn is caused by moisture loss and oxidation (exposure to air) in the freezer. It leads to ice crystals, shriveled produce, and tough, discolored meat. Boo to that!

  • Minimize Exposure to Air: Properly package your food before storing. For meat, poultry, and seafood, wrap it tightly in unbleached freezer paper or butcher paper first, then in a layer of foil, and place it in a freezer storage bag with all the air pressed out.

  • The Straw Trick: When using bags, zip them almost all the way closed, insert a straw to suck out the remaining air, then seal quickly!

  • Invest in Vacuum Sealing: If you buy meat in bulk, have a garden, or buy sales items, a vacuum sealer is a fantastic investment (look for BPA-free vacuum bags).

  • Keep Temperatures Steady: Avoid opening and closing the freezer door unnecessarily.

  • Rotate Inventory: Aim to use frozen foods within 2 to 4 months. Date your packages and practice “first in, first out.”

  • Rescuing Freezer-Burned Food: If your food gets a little freezer burn, don’t throw it out! It is still completely safe to eat. The texture might be slightly altered, so use it in forgiving dishes like soups, stews, sauces, or smoothies.

Storage Timelines & Food-Safety Guidelines

Since you know I’m not one for rewriting well-presented material when official resources exist, I’m simply going to direct you to the gold-standard charts!

Don’t Guess, Check!
Check the official FoodSafety.gov Cold Food Storage Chart—maintained jointly by the USDA, FDA, and CDC—for an exact itemized list of how long cooked meats, soups, and leftovers stay safe in the fridge and freezer.

Cheat Sheet!
If you prefer a printable cheat sheet to stick on your refrigerator door, download the FDA Refrigerator & Freezer Storage Guide. For quick lookups on specific ingredients on the go, the USDA’s FoodKeeper App is another amazing tool.

Generally Speaking:
As a general rule of thumb for batch cooking on the AIP, most cooked soups, stews, and meals are best enjoyed within 3 to 4 days in the fridge or within 2 to 3 months in the freezer for optimal flavor and quality.

AIP-Specific Guide:
This food storage article from Autoimmune Wellness covers shelf-life for everything from root veggies and fresh herbs to proteins. (One quick personal note: while this guide is super helpful, I disagree with their extended timeline for gelatin gummies. Because homemade gummies lack commercial preservatives, they tend to collect moisture and get moldy in the fridge quite quickly. I suggest eating homemade gummies within 3 to 5 days max, or keeping half the batch in the freezer!)

You Might Also Be Interested In:

Since life on the AIP can get a little “spendy” and we’re here making sure we store our food properly so we don’t waste any precious ingredients, you might also be interested in my post about Managing the AIP on a Budget.


Looking for seasonal AIP recipes, meal inspiration and practical resources to make life on the Autoimmune Protocol a little easier?

You’ve come to the right place!

My AIP Seasonal Collections are thoughtfully curated to help you navigate every season of the year. Whether you’re preparing for back-to-school, the holidays, special occasions or simply looking for fresh inspiration, each collection brings together delicious recipes, meal prep ideas, convenience options, trusted products, kitchen tools and practical strategies—all in one place.

autoimmune protocol newsletter autoimmune protocol recipes aip recipes aip recipe collection newsletter

Browse My Seasonal Collections

Explore my growing library of Seasonal Collections and recipe roundups designed to help you stay nourished throughout the year.

Seasonal Collections

More Recipe Roundups

💌 Never Miss a New Seasonal Collection

The easiest way to stay up to date is by joining the AIP Recipe Collection newsletter.

As a subscriber you’ll receive:

  • New Seasonal Collections delivered straight to your inbox plus bonus recipes.
  • A welcome email packed with some of my favourite beginner-friendly AIP resources to help you get started.
  • SAVE 40% on a Real Plans subscription—one of my favourite tools for making AIP meal planning easier, no matter what stage of the protocol you’re on.
  • Practical tips and trusted recommendations.
  • Exclusive discounts, giveaways and special offers from my favourite AIP-friendly brands.

My goal is simple: to save you time, reduce the overwhelm and make living the AIP lifestyle just a little easier, one season at a time.

I hope you’ll join me. ♥

Aip recipe round up newsletter


From time to time the topic of essential oils comes up in the AIP Recipe Collection Facebook Group, and I’m always quick to shut the conversation down because it typically turns into a debate or a sales pitch from someone trying to grow their network. That said, I don’t want to leave you hanging on the topic so I’m going to provide my take on the topic here. (NOTE: I do not sell essential oils and I am in no way affiliated with any essential oils companies.)
 
Let me begin by saying that I have absolutely no doubt that essential oils can have a place in our lives! I LOVE them and have personally found them beneficial for our family for things like inhalation, aromatherapy and topical application.
 
It’s really only when it comes to the topic of ingesting essential oils that I get a little worked up.
 
There are simply too many folks out there selling essential oils and recommending them as “safe for internal use,” sometimes suggesting that you simply need to make sure they’re 100% pure or food grade. I beg you, please consider factual information from completely independent sources rather than relying solely on the advice of someone who is trying to sell you essential oils. Purity and suitability for ingestion are two different things. 
 
And this is particularly important if you’re following the AIP, because you may occasionally come across a recipe that recommends an essential oil as a substitute for an extract. A drop or two of peppermint essential oil might sound like an innocent swap for peppermint extract, but these products aren’t interchangeable simply because they come from the same plant.
 
When I first began using essential oils, I avoided the big multi-level marketing companies – first, because of the price of their oils and secondly because I wanted a real education about essential oils, rather than a superficial understanding of what to use in a diffuser, cleaning or personal products. In my research, I came across Aromahead Institute and quickly realized that these folks are serious about aromatherapy education. I have referred people to them over the years as a useful resource and will continue to do so. 

Internal Use/Ingestion

Let’s get the big question out of the way first: Should you be adding essential oils to your food or swallowing drops of them?

My answer is no — not as a casual DIY practice.

Essential oils are highly concentrated mixtures of plant compounds. The fact that an oil comes from an edible plant does not mean that consuming the concentrated essential oil is equivalent to eating the plant itself. Dose, concentration, formulation and route of administration all matter.

This is also where the phrase “100% pure” can be misleading. An oil can be pure and still be inappropriate to swallow. Likewise, seeing an essential oil described as “food grade” doesn’t mean that you should use it like a culinary ingredient or take drops of it directly.

There are legitimate therapeutic uses for certain essential oils taken orally in specific formulations and doses. That is very different from casually ingesting essential oils at home, and oral use is something I’d leave to an appropriately qualified healthcare professional who understands the particular oil, the intended use, dosing and potential interactions.

“While the internal use of essential oils is suggested by some, we believe in a cautious approach. A deep understanding of anatomy, physiology, and essential oil chemistry is necessary before internal use is considered.
– Source:  Aromahead Institute – Essential Oil Safety

Essential oils can cause adverse effects when swallowed, including irritation of the mouth and digestive tract, nausea and other gastrointestinal symptoms. Some oils can be toxic at relatively small amounts, and essential oils can also interact with medications. Children are particularly vulnerable to poisoning from essential oils.

So if you’re tempted to put a few drops of peppermint essential oil into your water because someone on the internet told you it’s good for your digestion, I’d suggest putting the bottle down and doing a little more research first.

Essential Oil vs. Extract

This is worth a little detour because it’s one of the reasons I originally wrote this article.

You may occasionally see an AIP recipe calling for a drop or two of peppermint, orange or another essential oil because the recipe creator is using it in place of an extract.

I wouldn’t automatically make that substitution.

Essential oils and culinary extracts are made differently and contain very different concentrations and combinations of plant compounds. An essential oil isn’t simply a more concentrated version of the extract in your baking cupboard.

If a recipe calls for an extract, my first choice is to find an AIP-compatible extract. And a quick update if you’ve been around the AIP for a while: alcohol-free extracts are no longer required because the amount is so miniscule, it’s not worth stressing about. Instead, however, look for a quality, pure, organic extract and check the ingredient list carefully. Avoid products containing “natural flavors” or “artificial flavors,” since these are catch-all terms that don’t tell you exactly what you’re getting.
Looking for quality ingredients? Browse the Baking Ingredients section of my AIP Storefronts on Amazon USA | Canada| UK.

If you can’t find a suitable extract, I’d rather you adapt the recipe than casually start adding essential oils to your food. And here’s my favorite rule of thumb when it comes to the AIP:

If you’re looking for the flavor or benefits of an edible plant, eat the plant!

For recipes, that might mean using lemon or orange juice or grated zest, or fresh peppermint or oregano leaves when appropriate, rather than reaching for the essential oil.

Aromatherapy & Topical Use

Okay, so if we’re going to be cautious about using essential oils internally, is there any point discussing the topic further for our purposes on the AIP?

Absolutely!

There are plenty of aromatic and topical ways to use essential oils, and research suggests that aromatherapy may be helpful for things such as relaxation, stress and certain types of pain. The evidence isn’t equally strong for every use, and essential oils aren’t a substitute for appropriate medical care, but that doesn’t mean there’s no place for them.

My use of essential oils began out of desperation with my husband’s migraine headaches. He was taking migraine medication EVERY day for a long stretch of time and was finding no relief. Add to that his debilitating chronic pain and fibromyalgia – not a good scenario.

It was at that point that I started researching essential oils, attended a few webinars and took some online courses with Aromahead Institute.

I started slowly at first, simply using an ultrasonic diffuser with peppermint essential oil for him or having him use a homemade inhaler, and then branched out into some specific oils recommended for his ails. 

Did essential oils help him? In our experience, yes. But that’s our experience, and essential oils can affect different people very differently. What works beautifully for one person may be completely ineffective — or even irritating — for someone else.

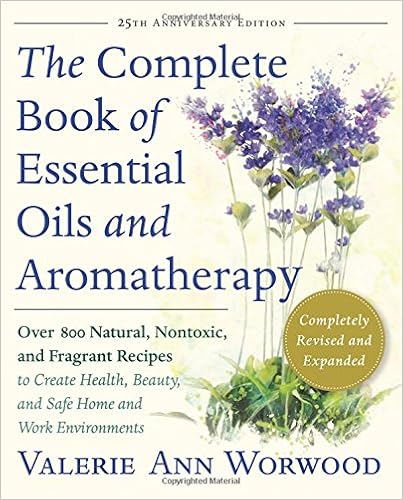
Since I’m not an herbalist or aromatherapy specialist I’m simply going to suggest this amazing reference book that can help you – it’s my go-to encyclopedia for all things essential oils! Grab a copy of “The Complete Book of Essential Oils and Aromatherapy” by Valerie Ann Worwood – click here.

A Word About Topical Use

Essential oils are highly concentrated, so topical application generally means dilution rather than putting the oil directly on your skin.

The appropriate dilution depends on the particular oil, the person using it and what you’re using it for. Some oils also have specific safety considerations, including the potential to cause skin irritation, allergic sensitization or increased sensitivity to sunlight.

Always check the safety information for the particular oil you’re using rather than assuming that because one essential oil is safe in a particular dilution, all essential oils are.

I find it very convenient to use roller bottles for topical application and love having a number of blends prepared and ready to go.

And, as with anything you put on your skin, start conservatively. Your skin doesn’t need an essential-oil overachiever!

Digestive Upset

Since many people following the AIP suffer with digestive upset, this may be an area you want to consider incorporating essential oils. 

Some essential oils are traditionally used in aromatherapy or massage for digestive discomfort, like ginger, tarragon, peppermint, clove and oregano. I wouldn’t, however, recommend treating digestive problems by swallowing essential oils, and I wouldn’t assume that because an oil is associated with digestion that it will necessarily help your particular symptoms.

So, how can you use them?

1. Aromatically. One option is aromatic use. When you inhale an essential oil, the aromatic compounds interact with the olfactory system and can influence the nervous system. This is one reason aromatherapy is being studied for things such as stress, nausea and other symptoms.

2. Topically. As mentioned above, another option is appropriately diluted topical use, such as massage or through roller ball application.

Digestive Relief Massage &  DIY Blend

If you’d like to experiment with topical aromatherapy, Aromahead Institute has a Digestive Belly Rub Blend that you can use as a starting point.

When using a massage oil blend, apply the appropriately diluted oil gently rather than aggressively rubbing it into the skin. And remember that a topical essential-oil blend is being used for its aromatic and massage application — it isn’t a substitute for addressing the underlying cause of persistent digestive symptoms.

Quality Oils

As you are likely aware, there are many options out there for essential oils, and prices vary dramatically!

I personally will not use the extremely high priced oils offered by the big multi-level marketing companies that quickly come to mind, and I won’t affiliate or sell these products because I firmly believe that people can find excellent quality oils without paying a premium simply because of the marketing model.

That doesn’t mean that I recommend buying the cheapest bottle you can find, either.

When purchasing essential oils, look for a reputable company that provides clear information about the botanical name, plant part used, method of extraction and appropriate safety information. Ideally, the company should be transparent about sourcing and quality testing rather than relying on vague claims about being “pure” or “therapeutic grade.”

I personally choose to purchase most of my oils from Ki Aroma. I’ve been happy with their products and pricing over the years, although I don’t opt for their blends because I prefer to make my own and find creating my own blends to be more economical. 

Essential Oils on the AIP: My Bottom Line

Essential oils are concentrated products containing biologically active plant compounds. They aren’t inherently good or bad — how you use them matters.

For me, the biggest distinction is between using essential oils aromatically or appropriately diluted on the skin and putting concentrated essential oils into my body.

I would not casually ingest essential oils, and I would not use them as a substitute for a culinary extract simply because an AIP recipe happens to suggest it.

If you’re interested in using essential oils, educate yourself about the specific oil, the route of application, appropriate dilution and any potential interactions or safety concerns.

And remember that essential oils are very individualized. What works for one person may not work for another, and I have found throughout the course of my own health challenges that I have become tolerant or intolerant to various oils along the way.

The bottom line?

Educate yourself, start cautiously and pay attention to your own response.

And if you’re following an AIP recipe that tells you to add a drop of peppermint essential oil to the batter because there’s no suitable extract available… well, that’s exactly the sort of thing that got me started on this soapbox in the first place.

…………

Further Reading

This post contains affiliate links.  Click here to see what that means.

Confused About Fruit on the AIP?

Since we avoid refined sugar and sweeteners on the AIP (read more about that here), it’s natural to wonder, is fruit allowed? 
 
The short answer is, Yes!
 
So, while you may have been advised by your AIP Coach, Nutritionist or Functional Medicine Practitioner to temporarily avoid fruit (for example, if you’re dealing with SIBO or another digestive issue where certain fruits may be poorly tolerated), and you should always follow the advice of your healthcare professional, it’s good to understand that fruit itself isn’t forbidden on the AIP elimination phase. Yay!
 
Fresh fruit can be a nutritious part of the AIP – think hydration, fiber, carbohydrates and plenty of vitamins, minerals and other beneficial plant compounds.
 

“… fruit itself is not restricted on the Autoimmune Protocol. Different varieties of fruit (especially colorful ones) come loaded with vitamins, minerals, and antioxidants which are a great compliment to a healing diet. While fruit can have a lot of sugar, that in itself is not reason enough to avoid it. When we eat fresh, whole fruit, we are getting the nutrients in a nice little package with fiber, nutrients, and water.” 

Read the full article on AutoimmuneWellness.com

What About Fruit With Seeds?

If seeds aren’t allowed during the elimination stage, what about fruit with seeds in or on them, like kiwi, strawberries, blueberries, etc.? The seeds in, or on, these fruits don’t make them off-limits. Whole fruits like berries and kiwi are allowed on Core AIP, despite containing small edible seeds.
 

What about dried fruit?

As you might have guessed, dried fruit is much more concentrated than fresh fruit because the water has been removed, so it’s easy to consume a lot more sugar in a small amount. Not to mention, many commercially produced options contain added sugars, non-compliant oils and preservatives we need to watch for. For compliant options, check out Wild Zora – shop here.

Dried fruit is best enjoyed in moderation as an occasional treat, as part of a dessert, or as a sweetener in a recipe. Some folks will add a date to a veggie smoothie to add some natural sweetness.

“Dried fruit, however, can be problematic because of its high glycemic load, and should be reserved for the occasional treat. I find dried fruit particularly easy to over eat and only reserve the use of say dates in a dessert or something, never as a snack.”
 
– Mickey Trescott of Autoimmune Wellness
That said about snacking, I will admit that when I first started the AIP I found that consuming just one or two quality dates filled with solid coconut oil or coconut butter and a pinch of salt was enough to keep me on the straight and narrow. So, if a piece of dried fruit is going to help you keep your AIP sanity, just eat it! Remember – it’s progress over perfection that we’re looking for. You’ve got this!

A Sweet Disclaimer: 

On the topic of dried fruit, treats and desserts, this feels like an appropriate place to add this message. I often get folks criticizing me in my AIP Recipe Collection Facebook Group because you’ll find a LOT of recipes with dried fruit and sweet treats, especially around seasonal holidays. Yep, I’m guilty! I’m guilty of providing LOTS of options so you have a variety to choose from when you have a special occasion or simply need a little indulgence.

The disclaimer in the group’s pinned post reminds members that all sweets and treats are to be consumed in moderation, and the same goes for the recipes and content I share here. I’m not here to tell you what you should or shouldn’t eat. I’m here to provide options and let you make the food choices that are right for you.

Now … Keep Calm & Carry On … Eat Fruit!

Can I Eat Out While I’m On The AIP?

One of the questions I hear a lot is, “Can I eat out while I’m doing the AIP?”

The short answer is yes… but depending on where you are in the process, it may be easier said than done.

Eating at home gives you something a restaurant simply can’t: complete control over the ingredients, cooking fats, seasonings, preparation methods and potential cross-contact. That’s especially important during the elimination phase, when the whole point is to remove the foods you’re testing and give yourself a consistent baseline.

That doesn’t mean you have to become a hermit until your elimination phase is over! It does mean that eating out during strict elimination requires a little more planning, and sometimes the most sensible choice is to bring your own food instead.

As you move through the AIP and successfully reintroduce foods, eating out generally becomes easier because you know more about what works for you. But wherever you are in your AIP journey, a little preparation can make a restaurant meal much less stressful.

Start by asking yourself: Is eating out worth the risk right now?

This is probably the most important question, and it’s one only you can answer.

If you’re brand new to the AIP and you’re trying to establish a clear baseline during elimination, I wouldn’t make restaurant meals a part of the experiment. Even a meal that looks AIP-friendly can contain ingredients you didn’t expect.

Think marinades, sauces, spice blends, cooking fats, broths, dressings, garnishes and seemingly innocent condiments. Then there’s the possibility of cross-contact with foods being prepared in the same kitchen (hello gluten!).

The more variables you introduce, the harder it can be to know what caused it if you don’t feel well afterward.

If you’re in the early stages of elimination and have the option of eating a meal you’ve prepared yourself, that’s usually the better choice.

But life happens. Birthdays happen. Business lunches happen. Vacations happen. Sometimes you simply want to sit down at a table with other human beings and let someone else do the cooking.

That’s where a little planning goes a long way.

Do Your Homework

If you’re planning to eat out, check the menu before you go.

You’re looking for somewhere that has reasonably simple foods and, ideally, a kitchen that is willing to make a few substitutions. Restaurants that cater to food allergies or offer gluten-free options may be easier to work with, but don’t assume that gluten-free or Paleo automatically means AIP-friendly.

If you’re unsure, call ahead and ask.

And don’t be afraid to ask whether a dish contains ingredients you avoid. Sauces, marinades, dressings, spice blends and cooking fats are all things that can turn an otherwise suitable-looking meal into something that’s not going to work for you.

If the restaurant can’t accommodate your needs, it’s much nicer to know that before you’ve arrived hungry and everyone else is already ordering.

Keep It Simple

This is not necessarily the time to order the chef’s seven-course tasting menu.

When you’re eating out during any phase of the AIP, simple is your friend.

A plain piece of grilled or baked meat, poultry or fish with simply cooked vegetables may not be the most exciting meal you’ve ever eaten, but knowing exactly what you’re getting has its advantages.

Depending on what’s available and what you’ve successfully reintroduced, you might also be able to order a plain baked sweet potato, salad or fresh fruit.

Ask for sauces, dressings and seasonings to be left off and find out what the vegetables are cooked in. Butter, dairy, grains, soy, nightshades and other ingredients can turn up in some surprising places.

And if the server isn’t sure what’s in something, ask them to check with the kitchen rather than taking a guess.

Be Clear About What You Need

You don’t have to give your server a lecture on the AIP.

In fact, I’ve found it can be much more helpful to explain exactly what you need rather than simply saying, “I’m on the AIP – most people haven’t a clue what that means!”

For example:

“Could I have the grilled fish with no sauce or seasoning, and vegetables cooked without butter?”

That’s a request the kitchen can actually work with.

If you have a true food allergy or celiac disease, be sure to make that very clear to the restaurant. Cross-contact can be a serious issue in that situation and requires a different level of caution.

If you’re avoiding foods as part of the AIP rather than because of an allergy, it’s important to make that distinction too.

Don’t Assume “Gluten-Free” Means AIP

This one catches people out all the time.

A gluten-free menu can be extremely helpful, but gluten-free and AIP are two very different things.

A gluten-free entrée can still contain dairy, eggs, legumes, nightshades, nuts, seeds or other foods excluded during Core AIP.

The same goes for menus labelled Paleo. Paleo-friendly doesn’t necessarily mean AIP-friendly either.

Use these labels as a starting point for finding a restaurant that understands dietary restrictions, not as a guarantee that everything on the menu fits your current AIP food list.

Don’t Use a Restaurant Meal for a Reintroduction

If you’ve reached the reintroduction phase, restaurant meals may become easier as you add foods back into your diet. But a restaurant isn’t the place I’d choose to test a food you’ve never reintroduced before.

A proper reintroduction is designed to tell you how you respond to one food. A restaurant meal can contain a whole collection of ingredients, cooking fats, seasonings and sauces that you may not even know about.

That’s a pretty risky science experiment!

Save the new food for a controlled reintroduction at home, where you’ll actually know what you’re testing.

Have a Back-Up Plan

Even after doing your homework, you may arrive at the restaurant and discover that your carefully planned meal isn’t going to work.

It happens.

This is where having a little something with you can save the day. An AIP-friendly bar, jerky, dried fruit or another portable snack can take the pressure off when your choices are limited.

I like to have a few AIP-friendly snack options on hand when I’m travelling or heading somewhere I’m not sure will have suitable food. It’s much easier to make a good decision when you’re not absolutely starving!

You can also eat something before you go.

There’s no rule saying you have to arrive at a restaurant absolutely starving just because you’re going there for dinner. If you know the options are going to be iffy, have a meal or snack beforehand and enjoy the social part of the evening without making the food the main event.

And sometimes, you may simply decide that eating at home is the better choice. That’s okay too.

When You Just Don’t Want to Cook

Of course, eating out isn’t always about going out.

Sometimes you just don’t want to cook.

I get it. Following the AIP means a lot of cooking, especially during elimination. There are days when the thought of chopping another vegetable or washing another pan is enough to make takeout look very appealing.

If what you’re really looking for is the convenience of having a meal prepared for you, without having to navigate a restaurant menu, Urban AIP is another option to consider.

Urban AIP offers AIP-friendly frozen meals that can be delivered to your door, giving you something to keep in the freezer for those nights when cooking just isn’t happening.

Enjoy the Experience!

It’s easy to get so focused on whether a restaurant can accommodate your diet that you forget why you’re there in the first place.

You’re there to celebrate a birthday, catch up with a friend, have dinner with your family or simply enjoy a night out without doing the dishes.

If your meal ends up being plain grilled chicken and steamed vegetables while everyone else is tucking into something considerably more exciting, try not to let it ruin your evening.

The AIP is supposed to help you build a way of eating that works in real life. And real life includes restaurants.

You may not always get the perfect meal. You may have to ask a few questions, make a few substitutions or occasionally bring your own food.

That’s okay.

Do what works for you, know your limits, plan ahead when you can, and remember that the company you’re keeping is probably more important than what’s on your plate.

And if you’re looking for more ideas for managing the social side of the AIP, including parties, invitations, discussing your dietary approach with a host or hostess, and other situations where food gets involved, check out my Social Life on the AIP post too.

While I’m not a parent, I can appreciate that feeding your kids AIP could be quite a challenge, especially since they’re likely already accustomed to the brightly colored, artificially flavored, sugar-laden main-stream foods like Kraft Dinner, frozen pizzas and Fruit Loops! Heck – you might even have a challenge feeding your “big” kids (aka teens and husbands) an AIP diet for the same reasons!

Unfortunately there’s no guaranteed, “silver-bullet” available, it’s going to take some trial and error to make the transition, but the good news is that it is possible!

Shhh … No One Needs to Know!

If you’re here, I’m assuming you’re dealing with autoimmune disease, chronic fatigue and the like. You know how difficult it is to be exhausted, feeling like you’re shackled to the kitchen prepping food. Compound that with picky eaters in the family or kids that you’re trying to transition to a clean diet and you’re probably going bonkers … am I right!?

My top tip – NO ONE NEEDS TO KNOW IT’S AIP (Paleo / Whole30 or what ever healing diet you’re using)! Before you started on the AIP, did you feel it necessary to tell your family about all the ingredients you put in the meal you were presenting? I’m pretty sure the answer is “no!”

I find that as soon as you label anything as being out of the ordinary, you will meet with resistance.

I’ve seen it happen with my extended family – if you tell them something’s gluten free or AIP they simply decline. However, if they were to eat it without knowing, they’d probably never realize it was anything “special” – and trust me, I’ve tested this theory!

Always remember, it’s not AIP Food … it’s just real food! Will every dish be a hit? No … but just make your meals, make no fuss and adjust where you need to. 

I’m providing additional resources for getting your family on board with the AIP below, so don’t miss out on those for more tips and suggestions.

You Eat What You See

As you’re setting up your kitchen, clearing out your pantry and just generally trying to set yourself and your family up for success (check out my article Prepping Your Kitchen & Pantry for the AIP), remember this tip! Keeping healthy options readily available on counters or at the front of the fridge or pantry means they’re more likely to get eaten – you and your family eat what you see!

Making sure your fruits and veggies are washed when you bring them home from the grocery store really helps, but you can take it one step further and pre-chop and/or peel veggies and fruit so they’re easy to grab and go when you’re feeling a little snackish. Granted, this works better with some options than others, but there are an abundance of tips, tricks and hacks on the Internet to help set you up for success. Some examples would be to cut up celery and carrot sticks and store them submersed in water in mason jars, be sure to you peel or slice an orange and put it in an air-tight container to take it along for work or school snacks – something that’s already cut open is not only easier to snack on, it’s also going to spoil, so you’ll be more apt to consume it rather than just taking that apple or orange for it’s daily trip to the office/school!

Another tip is to have a few simple-to-prep snack ideas in mind for when you need to whip something up. Don’t miss my AIP Snack Guide.

Nutrient Density & Food Familiarity

I’m not gonna lie, there are some things that you’re likely to have a little more trouble with, (yes, I’m talking about liver and offal), but again, you don’t have to tell your family everything! You’re allowed to hide “gross” foods from your kids, and even yourself, in order to ensure you’re eating a more nutrient dense diet. You’ll find many recipes in the AIP Recipe Collection Facebook page that are named “hidden veggie” or “hidden liver” or something similar.

Here’s a little fun-fact: Did you know that liver is a flavor enhancer?!

What we’re talking about here is called “food familiarity,” and there’s actual science behind it! Familiar flavors and textures in dishes we’re used to eating work in our favor as we incorporate small amounts of “less popular” foods. Things like a hidden liver meatloaf, meat balls or burgers are a great starting point as we transition to healthier choices on the AIP.

If you’re having trouble incorporating liver in your diet, try this starter recipe from Dr. Ballantyne – 50/50/50 Burgers – she says her girls even ASK for these burgers, and I personally love them for breakfast (the liver definitely enhances the flavor) – they’re even delicious cold! Or, try my Blueberry TigerNut Muffins with Hidden Liver – I eat them almost every day – you’d never know there was liver in them!

Another important note is that different kinds of liver have different flavor profiles, butchering processes/practices effect the taste of meat, as do different breeds of cattle, pork, chicken and so on … so you might have to try a few different kinds before you find something you and your family really enjoy.

Positive Association

Another trick to getting your family on board as you transition to your new AIP diet is the use of positive association.
 
As an adult, we start liking and enjoying healthier foods when we feel the positive results – it’s hard not to enjoy something if it makes us feel better and it gives us more energy!
 
For kids, it’s going to be a little different – they won’t necessarily realize that food can make them feel better, though some of them are pretty in-tune to their bodies (my nephew knows that pasta sauce makes him feel yucky, I’m willing to bet that tomatoes are likely not his friend). It’s a good idea to start a tracking journal on behalf of your children – food/mood/poop journals are what we use for ourselves during the elimination stage, so it makes sense we’d do this for our AIP kiddos too. As a parent, being aware of changes to energy levels, moods, etc… will help you determine what’s right and what’s less than ideal for your family.
 
Your best approach is to ensure mealtime is  enjoyable – avoid making it all about the new food you “have to eat” – no one ever enjoys being forced to eat something. Obviously there may be some bargaining that takes place to get your kiddos to at least try those new foods that you can’t disguise, but try to keep it up-beat. Make sure meal times are relaxed and try to stay focused on the positive things going on in their life and yours. Use it as a time for communication and kindness – learn about what happened during their day, keep them distracted to a degree, and talk about something fun you can do together after your meal. Positive social dynamics at mealtime will help attach positive association food… and it will get easier.
 

Get the Family on Board

You can find some good advice in these articles from Autoimmune Wellness – How to Inspire Health in Your Home & Getting Your Child On Board With Dietary Changes.
 
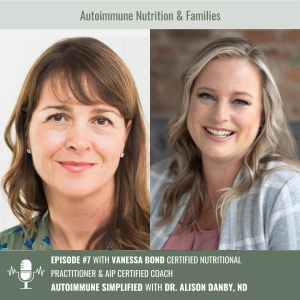
I also highly recommend you listen to the Autoimmune Simplified episode called Family Nutrition with Autoimmune, where Dr. Alison Danby speaks with Nutritionist Vanessa Bond whose daughter has a very rare autoimmune condition – the advice offered in the podcast is truly exceptional. Included below is a link to Vanessa’s Facebook Group called “The Autoimmune Family” – don’t miss it.

Pregnancy, Breastfeeding, Babies & Kids

Since I frequently get questions in our Facebook Group for “kid-friendly” AIP meals, I understand that getting enough nutrients into them can be tricky, I’ve compiled this additional list of resources that I hope will help save you some frustrations.

NOTE:  NOT all of the information below is specifically about AIP, but it is about Paleo (of which the AIP is a modified version as you know). Use caution when determining what foods to include/exclude where this is discussed and above all, consult a professional healthcare practitioner. 

Facebook Group – The Autoimmune Family with Vanessa Bond

Facebook Support Group – AIP in Pregnancy & Breastfeeding

Paleo Leap – Cave Babies: Raising Happy, Healthy Paleo Kids
This article has some links to other web-pages and some specific information about nutrients.

Robb Wolf – Feeding Kids Paleo
Includes a FREE Guide Book if you sign up for his newsletter when you land on his page.

Positive Parenting Solutions – 8 Strategies for Picky Eaters 
This isn’t just Paleo or AIP, but the tips can be applied.

Grazed & Enthused – Real Food Baby: How We Introduced Solids

Looking for Kid-Friendly AIP Recipes & Conveniences?

Familiarity is a kid’s best friend – so try to keep it as “normal” as possible.

The first option that comes to mind when I think about convenience food for kids and toddlers is Serenity Kids – click to find out why I’m so excited about these products.

Lovebird cereal - 15% Off!Lovebird Cereals are another must-have! It’s the cleanest cereal on the market, takes you back to childhood, and they give-back to childhood cancer research. Click the link for a discount, my review and a round up of recipes you can make with it.

I also recommend that you try using the search function over in our Facebook Group – try searching “kid friendly” “snack” “brown bag” or the particular dish you’re looking for … like “mac n cheese” or “shepherd’s pie” or “veggie poppers” or “nuggets” or even “baby food” if you’ve got a toddler!


Check out our Food Sourcing page where you’ll find links to my Categorized AIP Amazon Storefronts for Canada, UK and USA. I also have a specific AIP Amazon.com Storefront Section for AIP & Paleo Kids.  You’ll probably find my AIP Snack Guide handy too!

SAVE with coupons from our affiliates – grab the current codes here.

This post contains affiliate links.  Click here to see what that means. 

I don’t know about you, but the changes from Fall to Winter and Spring to Summer really give my body a beating. Sometimes it’s the weather, sometimes it’s just me ignoring the fact that my body’s “check engine light” has been on for a while because there’s simply so much to be done.

When flares happen (and they will), it’s time to get back to basics.

I hope this flare care toolkit gives you a few gentle reminders and practical ideas to return to when symptoms ramp up.

Back to Basics

When things start to feel “off,” it’s best not to try and overhaul everything.  The goal isn’t to fix it overnight. It’s to steady things enough that your body has space to settle. Catching these subtle “smoke signals” early—like shallow chest breathing, tight shoulders or jaw, sudden brain fog, or unusual sugar cravings—gives you the chance to rest before a full flare takes over. 

Listen to the Autoimmune Simplified Podcast: Autoimmune Flares Don’t Start in the Immune System

Want to take a deeper dive into where flares actually begin? Listen to Dr. Alison Danby’s Autoimmune Simplified Podcast “Autoimmune Flares Don’t Start in the Immune System” — where she breaks down some new research on wearables and how your nervous system signals a coming flare long before symptoms show up. Spoiler alert – it’s not necessarily something you ate!

Considering a wellness tracker? Check out some recommended options in my Amazon AIP Storefronts here: USA | CANADA | UK

Just simplify!

Not as a restriction, but as a way to reduce the load on a system that’s already working overtime.

  • Rest first, not last
    If rest only happens after everything is done, it usually doesn’t happen at all. (Struggling with Sleep – read my post here)
  • Simplify food choices
    Nothing fancy. Just steady, nourishing meals your body already knows how to handle. Remember: a flare-up doesn’t mean you failed or that you have to restart strict AIP Elimination from day one. Instead of stressing over strictness, simply scale back for 2–3 days to easy, baseline comfort foods … like warm bone broth or well-cooked root vegetables … until acute symptoms settle. (I’ve included some basics below)
  • Lower unnecessary stress where possible
    Not everything can be controlled, but some things can be paused or delayed.
  • Hydration + minerals
    Easy to overlook, but often one of the first things that makes symptoms feel louder when it’s off. Keep plain water or mineral-rich liquids nearby throughout the day.

Get Grounded (Beyond Food)

Self Care & Stress Management for autoimmune warriors - aiprecipecollection.comNot everything supportive comes from the kitchen.
Some of the most helpful things during a flare are simple environmental cues that tell your nervous system it’s safe to downshift.

When you are too exhausted to cook or move, simple 2-minute somatic resets help shift your body out of fight-or-flight mode:

  • box breathing, slow belly breathing (4 counts in, 6 counts out), or humming
  • the Butterfly Hug (crossing your arms over your chest and rhythmically tapping your shoulders at your resting heart rate)
  • relaxing Epsom salt baths (great for soothing muscle aches and absorbing magnesium) or try visiting a float tank – I love doing this!
  • time outside, even briefly
  • bare feet in the grass or toes in the sand
  • seek out quiet, low-stimulation spaces when possible
  • gratitude, Hygge and Ho’oponopono practices
  • slow walks or just sitting in nature  – have you tried “forest bathing?
  • nature sounds (birds, wind, water – the real thing or indoors on your favorite device)
  • restorative yoga or simply putting your legs up the wall
  • art therapy, coloring, painting, or simply getting creative

These things don’t necessarily “treat” a flare—but they do help take the edge off the stress load that often comes with it.

Visit my AIP Storefronts on Amazon and check out the AIP Lifestyle, Art Therapy, Self-Care, Exercise & Movement Categories to get started. 
USA / Canada / UK

Summer: When Heat Adds Another Layer

Summer deserves its own section because heat can change the game big time!

For many people with autoimmune conditions, warmer weather can show up as:

  • increased fatigue
  • feeling more dehydrated than expected
  • joint stiffness and inflammation
  • poorer sleep
  • quicker symptom flare-ups

A few simple adjustments can help:

  • Hydration becomes non-negotiable
    This might look like coconut water, electrolyte support, or infused water depending on what you tolerate.
  • Ginger can be helpful for comfort
    Especially in drinks like ginger lemonade or infused water.
  • Pacing matters more than pushing through
    Heat + activity is often more draining than it feels in the moment. Be gentle with yourself and give your body grace when you need to slow down.

The challenge in summer isn’t to do more—but to protect your baseline so you’re not paying for it later (I know … easier said than done).

Listen to the AIP Summit Podcast: Hot Weather & Autoimmune Disease

If you’d like to explore summer flare care in more depth, this episode of The AIP Summit Podcast covers a variety of strategies for navigating the warmer months.

“Hot weather has varying impacts on individuals with autoimmune diseases. This episode highlights how heat can exacerbate inflammation and affect temperature regulation, leading to increased discomfort for those with conditions like multiple sclerosis, lupus, and inflammatory bowel disease. Hosts Marie-Noelle Marquis and Jaime Hartman discuss strategies to mitigate these effects, such as staying cool, protecting skin from sunburn, and maintaining hydration. They emphasize the importance of stress management and balanced nutrition during summer months. The podcast also covers lifestyle adjustments, including sleep and movement, to accommodate the challenges posed by hot weather.”

Click here to listen or read the transcript.

Additional Flare Care Resources

If you want to dive deeper into the emotional and physical side of flares, these are two helpful reads from Autoimmune Wellness:

AIP Basics Food is Medicine - aiprecipecollection.com

Recipe Round-Up: Flare-Friendly Basics

When things feel off, I try to return to simple, nourishing staples.


I’ll be the first to admit that while I love the taste of grilled food, I didn’t always have the confidence to be the one wielding the tongs. That’s where my sister came in. She’s the outdoor kitchen expert in our family, and over the years she’s shared plenty of simple tips that have saved dinner (and prevented a few fiery sacrifices along the way). Thanks to her, I can now hold my own at the grill—and every once in a while, she even asks me to take over.

Whether you’re firing up the grill for the first time or just looking to up your BBQ game, these easy grilling tips can help.

Your Outdoor Kitchen - BBQ, Grill & Picnics - AIPRecipeCollection.com

The Right Tools For The Job

If you’re building out your backyard setup (or just love a good picnic or potluck situation), I’ve linked my outdoor kitchen essentials here on Amazon — everything from grilling tools to the everyday basics we actually use and reach for all the time.

Think grill-side must-haves, plus the fun little extras that make hosting easier too.

Shop my outdoor kitchen setup here: USA / Canada / UK

Make the Grill Work for You

The grill isn’t just for backyard BBQs and entertaining. Once you start thinking of it as an everyday cooking tool, it can actually make weeknight dinners easier, faster, and with less cleanup.

Here are a few habits that have helped me get more use out of mine:

🔥 Treat It Like a Stovetop

Don’t save the grill for special occasions.

Chicken thighs, burgers, sausages, steak, salmon, vegetables… if you’d normally cook it in a frying pan, there’s a good chance you can cook it on the grill instead. During the summer, it keeps the heat outside and usually means fewer dishes to wash.

🍗 Batch Grill for the Week

If the grill’s already hot, make it worth your while.

Throw on a few extra chicken breasts, burgers, or steaks while you’re cooking dinner. Slice them up and stash them in the fridge for salads, wraps, bowls, or quick lunches throughout the week.

⏱️ Keep Dinner Simple

Grilling doesn’t have to be an event.

One protein, one vegetable, maybe a baked sweet potato or salad on the side, and dinner is done. Some of our favourite meals are also the simplest.

🥩 Keep the Freezer Grill-Ready

The secret to easy grilling often starts long before you light the grill.

Keeping your freezer stocked with good-quality proteins means you’re never scrambling to figure out what’s for dinner. Thaw something in the morning, fire up the grill after work, and dinner is on the table in no time. Check out one of my favorite recipes for 5 chicken marinades you prep and toss in the freezer – So easy ~ So Tasty!

If you’re in the USA, I personally recommend ButcherBox (click here for their latest amazing offer – they often have a FREE for “life” promo) . For my fellow Canadians, TruLocal (click here to check them out – they also usually have a FREE for “life” promo) has become one of my favourite ways to keep the freezer stocked. 

Grill Like a Pro (Even If You’re Just Getting Started)

🔥 Preheat the Grill

A hot grill is a happy grill.

  • Give it 10–15 minutes to heat up before cooking.
  • A properly heated grill helps prevent sticking.
  • High heat creates those beautiful grill marks and better flavour.

Sister’s tip: “Get the grill screaming hot before anything goes on. That sear is everything.”

🧂 Season Earlier Than You Think

Don’t wait until the last second.

  • Salting meat ahead of time helps enhance flavour.
  • It draws moisture to the surface, then allows it to reabsorb back into the meat.
  • Even 30–60 minutes ahead can make a difference.

Seasoned with wisdom: “Salt it way earlier than you think.”

🧻 Pat It Dry

Moisture is the enemy of a good crust.

  • Use paper towels to blot excess moisture from meat before grilling.
  • A dry surface helps create better browning.

Translation: Less steaming. More searing.

🔥 Learn Direct vs. Indirect Heat

This one changes everything.

Direct heat: Food cooks directly over the flames. Great for:

  • Burgers
  • Steaks
  • Kabobs
  • Vegetables

Indirect heat: Food cooks beside the heat source. Ideal for:

  • Larger cuts of meat
  • Bone-in chicken
  • Anything that needs more time

Think of it as the difference between sautéing and roasting.

🔄 Resist the Urge to Flip Constantly

More isn’t always merrier.

  • One flip is usually enough for burgers, steaks, and chicken breasts.
  • Repeated flipping can interfere with browning.

Grilling confessions: I used to flip constantly and wonder why my burgers were dry.

👂 Use Your Senses

The grill talks. Really.

  • The sound of the sizzle changes as food cooks.
  • Learn to trust visual cues instead of relying only on a timer.
  • If it sticks, it’s probably not ready to flip.

🌡️ Use a Meat Thermometer

Your best grilling investment.

  • Guesswork leads to overcooked food.
  • An instant-read thermometer takes the stress out of grilling.
  • No cutting into everything to “check” and hoping for the best.
  • Different proteins have different safe internal temperatures.

Safe Internal Temperatures for Grilling

  • Chicken breasts, thighs, drumsticks & whole chicken: 165°F (74°C)
  • Turkey: 165°F (74°C)
  • Ground beef (burgers): 160°F (71°C)
  • Ground pork: 160°F (71°C)
  • Steaks & roasts (beef, veal, lamb): 145°F (63°C), then rest for at least 3 minutes
  • Pork chops, pork tenderloin & pork roasts: 145°F (63°C), then rest for at least 3 minutes
  • Fish: 145°F (63°C), or until it flakes easily with a fork
  • Shrimp: Cook until opaque and pink

Sister’s tip: “Pull larger cuts of meat off the grill about 5°F (3°C) before your target temperature. They’ll continue cooking while they rest.”

⏰ Pull Food Off Early

Carryover cooking is real.

  • Food continues to cook after it leaves the grill.
  • Remove it about 5°F before your target temperature.
  • This helps prevent overcooking.

😌 Let It Rest

Yes, even when everyone is hovering.

  • Rest meat for 5–10 minutes before slicing.
  • This allows juices to redistribute.
  • Cutting too soon can lead to drier results.

Hardest grilling skill of all: patience.

🧽 Clean the Grill Grates

A little maintenance goes a long way.

  • Clean the grates while they’re still warm (I prefer a good wood scraper).
  • Clean grates help prevent sticking.
  • Less leftover char means better flavour.

🔥 Ready to Put These Tips to the Test?

Grilling doesn’t have to be complicated. A few simple techniques can make a huge difference, whether you’re cooking burgers for a weeknight dinner or hosting the neighbourhood BBQ.

And if you accidentally char something beyond recognition? Congratulations. You’ve officially joined the club. We like to call those extra smoky.

Now, it’s time to put those tips into practice? Click here for my grill series and give ’em a go! They’re perfect for beginners or seasoned grillers alike. 

Looking for more? Sign up for my newsletter and get links to 30+ delicious recipes in my June 2026 Summer Survival Guide (you’ll have access to the archives) – it’s a backyard BBQ Bonanza filled with inspiration for easy weeknight dinners and potluck picnics. 

Autoimmune Recipe Collection Newsletter Sign Up