I’ll be the first to admit that while I love the taste of grilled food, I didn’t always have the confidence to be the one wielding the tongs. That’s where my sister came in. She’s the outdoor kitchen expert in our family, and over the years she’s shared plenty of simple tips that have saved dinner (and prevented a few fiery sacrifices along the way). Thanks to her, I can now hold my own at the grill—and every once in a while, she even asks me to take over.
Whether you’re firing up the grill for the first time or just looking to up your BBQ game, these easy grilling tips can help.
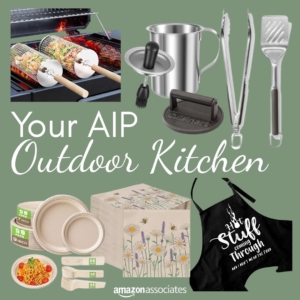
The Right Tools For The Job
If you’re building out your backyard setup (or just love a good picnic or potluck situation), I’ve linked my outdoor kitchen essentials here on Amazon — everything from grilling tools to the everyday basics we actually use and reach for all the time.
Think grill-side must-haves, plus the fun little extras that make hosting easier too.
Shop my outdoor kitchen setup here: USA / Canada / UK
Grill Like a Pro (Even If You’re Just Getting Started)
🔥 Preheat the Grill
A hot grill is a happy grill.
- Give it 10–15 minutes to heat up before cooking.
- A properly heated grill helps prevent sticking.
- High heat creates those beautiful grill marks and better flavour.
Sister’s tip: “Get the grill screaming hot before anything goes on. That sear is everything.”
🧂 Season Earlier Than You Think
Don’t wait until the last second.
- Salting meat ahead of time helps enhance flavour.
- It draws moisture to the surface, then allows it to reabsorb back into the meat.
- Even 30–60 minutes ahead can make a difference.
Seasoned with wisdom: “Salt it way earlier than you think.”
🧻 Pat It Dry
Moisture is the enemy of a good crust.
- Use paper towels to blot excess moisture from meat before grilling.
- A dry surface helps create better browning.
Translation: Less steaming. More searing.
🔥 Learn Direct vs. Indirect Heat
This one changes everything.
Direct heat: Food cooks directly over the flames. Great for:
- Burgers
- Steaks
- Kabobs
- Vegetables
Indirect heat: Food cooks beside the heat source. Ideal for:
- Larger cuts of meat
- Bone-in chicken
- Anything that needs more time
Think of it as the difference between sautéing and roasting.
🔄 Resist the Urge to Flip Constantly
More isn’t always merrier.
- One flip is usually enough for burgers, steaks, and chicken breasts.
- Repeated flipping can interfere with browning.
Grilling confessions: I used to flip constantly and wonder why my burgers were dry.
👂 Use Your Senses
The grill talks. Really.
- The sound of the sizzle changes as food cooks.
- Learn to trust visual cues instead of relying only on a timer.
- If it sticks, it’s probably not ready to flip.
🌡️ Use a Meat Thermometer
Your best grilling investment.
- Guesswork leads to overcooked food.
- An instant-read thermometer takes the stress out of grilling.
- No cutting into everything to “check” and hoping for the best.
- Different proteins have different safe internal temperatures.
Safe Internal Temperatures for Grilling
- Chicken breasts, thighs, drumsticks & whole chicken: 165°F (74°C)
- Turkey: 165°F (74°C)
- Ground beef (burgers): 160°F (71°C)
- Ground pork: 160°F (71°C)
- Steaks & roasts (beef, veal, lamb): 145°F (63°C), then rest for at least 3 minutes
- Pork chops, pork tenderloin & pork roasts: 145°F (63°C), then rest for at least 3 minutes
- Fish: 145°F (63°C), or until it flakes easily with a fork
- Shrimp: Cook until opaque and pink
Sister’s tip: “Pull larger cuts of meat off the grill about 5°F (3°C) before your target temperature. They’ll continue cooking while they rest.”
⏰ Pull Food Off Early
Carryover cooking is real.
- Food continues to cook after it leaves the grill.
- Remove it about 5°F before your target temperature.
- This helps prevent overcooking.
😌 Let It Rest
Yes, even when everyone is hovering.
- Rest meat for 5–10 minutes before slicing.
- This allows juices to redistribute.
- Cutting too soon can lead to drier results.
Hardest grilling skill of all: patience.
🧽 Clean the Grill Grates
A little maintenance goes a long way.
- Clean the grates while they’re still warm (I prefer a good wood scraper).
- Clean grates help prevent sticking.
- Less leftover char means better flavour.
🔥 Ready to Put These Tips to the Test?
Grilling doesn’t have to be complicated. A few simple techniques can make a huge difference, whether you’re cooking burgers for a weeknight dinner or hosting the neighbourhood BBQ.
And if you accidentally char something beyond recognition? Congratulations. You’ve officially joined the club. We like to call those extra smoky.
Now, it’s time to put those tips into practice? Click here for my grill series and give ’em a go! They’re perfect for beginners or seasoned grillers alike.
Looking for more? Sign up for my newsletter and get links to 30+ delicious recipes in my June 2026 Summer Survival Guide (you’ll have access to the archives) – it’s a backyard BBQ Bonanza filled with inspiration for easy weeknight dinners and potluck picnics.