This post contains affiliate links. Click here to see what that means.
If you’ve never heard the word “Hygge” before (pronounced HUE-ge), you might be curious why I’m posting about it on an AIP recipe website. Since I always intended this site to be about so much more than filling your bellies, I’m sharing this to fill your soul. Hopefully it will inspire you to make simple changes to your AIP lifestyle that can help reduce stress, decrease anxiety and disconnect from the pace of everyday life and the sometimes harsh realities of our limitations due to our illnesses.
Hygge is about joy and contentment. It is about experiencing happiness in simple pleasures and knowing that everything is going to be okay.
If you’re like me, thinking about creating a self-care routine just sounds like more work that you don’t have time for – am I right? Thankfully, the reality is that hygge can be as simple as dedicating time for yourself to enjoy any activity that makes you happy. It’s about intentional being more intentional with cozy wellness and small steps toward self-care. Snuggle up in a cozy pair of PJ’s with a warm, soft blanket and a favorite soothing drink, carve out time for art-therapy using paints or coloring books, listen to soft music, enjoy some aroma-therapy and some AIP comfort food or snacks.
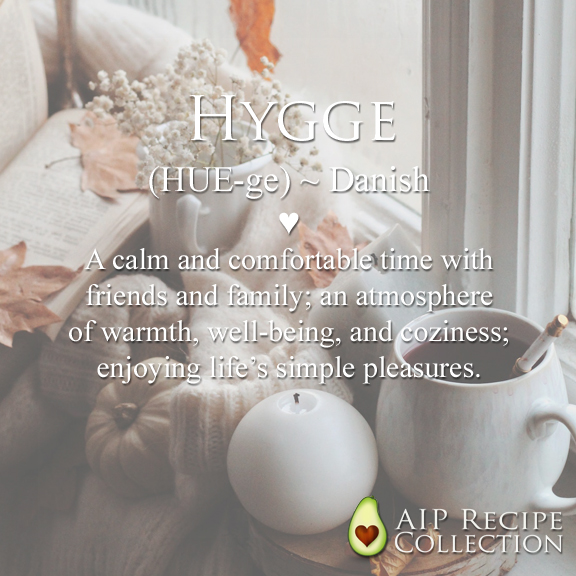
What is Hygge?
 The Danish word “hygge” is about the art of getting comfy and cozy, it’s a way of life, one that makes ordinary moments feel special, pleasurable, and meaningful.
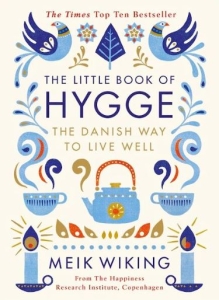
According to Meik Wiking, New York Times Best Selling author of The Little Book of Hygge: Danish Secrets to Happy Living, “Hygge is about an atmosphere and an experience, rather than about things.” It’s also about creating a comforting social and emotional environment or support network for yourself – which, if you’re paying attention you’ll know that having connection and a good support network is an important part of the AIP Lifestyle.
Benefits of Hygge
- Calms the Mind
Intentionally taking time to create a hygge atmosphere, get cozy and slow down is important for our mind and soul. You’ll find a sense of calm, and stress-less when you unplug and wrap yourself in the feeling of safety that this comfy lifestyle provides. - Relaxes Mind & Body
Climbing under a snuggly blanket or into a hot Epsom salt bath with the intention of relaxation (not to curl up with your phone in hand) helps us to relax and unwind. Allow your cozy blanket to be the trigger that reminds you to be mindful of your breathing, to be present. Drop your shoulders and let the tension go. - Nourishes Your Body
Consuming wholesome, home-cooked AIP comfort foods, and even an indulgent AIP treat now and then, nourishes your body. You’ll feel your best when you concentrate on eating “real,” nutrient-dense foods. There’s also something about cooking simple meals that really provides food for the soul – it’s reminiscent of cozy family meals growing up. - Promotes Connection
Hygge isn’t about being alone, it’s about being with loved ones. Slowing down to truly connect with friends or family in a positive, comfy environment helps increase happiness and feel-good serotonin levels. - Relieves Strain
Creating an atmosphere of hygge with candles or dimming the lights goes a long way to promoting relaxation and relieving tension that we may not even realize we have from the constant bombardment of blue light from devices and fluorescent lighting. - Improves Sleep
Learning to hygge helps us “unplug” from our hectic lives. Practicing self-care with hygge promotes an atmosphere of comfort where we can feel relaxed and safe. Removing negative feelings and slowing down should help reduce stress hormones and help improve sleep.
How to Hygge
- Be Present
A hygge lifestyle is about being in the moment. Get rid of the distractions, turn off the phone and connect with friends and family or just re-connect with yourself. Learn to really relax by creating a bedtime ritual (see my post on sleep struggles for more), or create a morning routine perhaps with gentle stretching and meditation that helps you get in the zone for the day. - Get Cozy
Think cozy sweaters, thick socks or slippers and warm blankets. Have you tried a weighted blanket? I hear it’s like being wrapped in a warm hug, and they can help with anxiety and stress. - Set the Mood
Candles and scents are a huge part of hygge. But since we’re careful on the AIP to remove toxins from our lives, be sure to choose unscented bees wax candles, and use quality essential oils to create a luxurious atmosphere with an ultrasonic aromatherapy diffuser. - Quality Time
Schedule hygge time – make it a special event – whether that be a casual dinner with friends, game night with the family, time to read a book or just relax and connect with your significant other. Carve time out of your busy life for this self-care practice, indulge in a special treat that you might not otherwise buy for yourself (check out my round up of delicious AIP snacks or try a cup of tea or AIP coffee that won’t make you wired). - Practice Mindfulness & Gratitude
Mindfulness and gratitude are key elements of hygge. If you’re new to meditation and mindfulness, try using a simple app like Insight Timer (it’s free), or simply make it a practice of recounting 3 things you have to be grateful for each night before you drift off to sleep. If you’re looking for more guidance on being mindful, I highly recommend the book by Eileen Laird called “Healing Mindset” - Comfort Food
And here we are – right back on track with the food and recipe theme of this website! I know you’re probably saying, “but my old comfort foods really aren’t AIP compliant!” I hear you … and quite frankly, that’s how this post actually came to being – because so many members of my AIP Recipe Collection Facebook Group requested comfort food recipes in a recent poll! Click here to reach the search results for “AIP Comfort Food” – this will get you started! Let the search results there inspire you to search for more recipes in the group.
AIP Comfort Foods – A Few Favorite Recipes
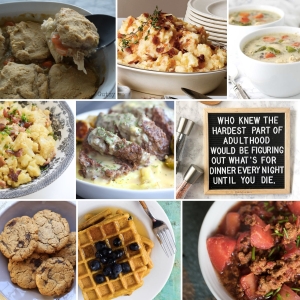
- Dinner Rolls – The Paleo Mom
- Chicken Pot Pie Soup – A Clean Plate
- Chicken Pot Pie – Chicken Pot Pie
- Instant Pot Meatloaf with Mashed “Potatoes” and Gravy – Predominantly Paleo
(use a DIY Worcestershire sauce or coconut aminos, omit paprika and black pepper, use white sweet potatoes & coconut milk) - Magic Chili – Autoimmune Wellness
- Bacon Mashed Sweet Potatoes – AIP Recipe Collection
- Loaded Cauliflower Mac ‘N Cheese – Fake Ginger
(use non-fortified nutritional yeast – click here to read more) - Sweet Plantain Waffles – AIP Recipe Collection
-
Chewy “Chocolate” Chunk Cookies – AIP Recipe Collection
This round up was originally shared in my AIP Recipe Collection newsletter. If you want delicious AIP inspiration delivered to your inbox click here to sign up.
AIP Products & Discounts to Help You Hygge
URBAN AIP – Take a break from the kitchen and savor the comfort of AIP-compliant meals, delivered to your door. It doesn’t get cozier than this!
CLICK HERE TO SHOP: And save upto 10% with Subscription Boxes
SIP HERBALS – There’s nothing quite like relaxing with a warm cup of your favorite beverage – try the BEST Coffee Substitute we’ve ever tasted! All the coffee feels without the flaws.
CLICK HERE TO SHOP: And Save 10% Off Every Order with Coupon Code: AIP10
PIQUE TEA – Top Quality Toxin Free Tea! (Be sure to avoid adaptogenic blends during the elimination stage of the AIP)
CLICK HERE TO SHOP
LOVEBIRD AIP CEREAL – Curl up with a bowl of AIP cereal and bring back warm memories of your childhood.
CLICK HERE TO SHOP: And Save 15% Off Every Order with Coupon Code: AIP
EAT G.A.N.G.S.T.E.R. – Delicious and Convenient AIP Elimination Stage Compliant Baking Mixes.
CLICK HERE TO SHOP: And Save 10% Off Every Order! Coupon Code: AIP10
SWEETPOTATO AWESOME – Truly awesome AIP snacks with simplest ingredients! (Shop the AIP options)
CLICK HERE TO SHOP: And Save 10% Off Every Order with Coupon Code: AIPRECIPES
WILD ZORA – Delicious, comforting AIP meat and veggie bars, freeze-dried stews and soups, hot cereals and more!
CLICK HERE TO SHOP: And save 15% with Coupon Code: ZORAFAM15
AIP ON AMAZON – I’ve compiled lots of categorized lists for AIPers in AIP Amazon Storefronts – pantry items, snacks, treats, hard to find ingredients, books and cookbooks, AIP Lifestyle products, wellness devices and so much more!
Check them out! Click the location nearest you – USA / Canada / UK.
Looking for easy access to seasonal AIP recipes, tips and resources?
You’ve come to the right place ~ Welcome to the AIP Recipe Collection Newsletter!
Since many of you are not on Facebook (click here for the searchable AIP Recipe Collection FB Group), and we never quite know what’s going to happen with some of these social channels and their censorship, back in 2021 I decided to start my own newsletter so we can always stay in touch, and so that I can continue providing regular inspiration for your AIP (Autoimmune Protocol / Autoimmune Paleo) healing journey.
Each month I deliver delicious, seasonal recipe inspiration right to your in-box. Subscribers receive an easy list of links that take you directly to the original recipe creator’s website, AIP cooking and lifestyle tips and tools to make your healing journey easier, advance notice of sales, giveaways, discounts and more!
Sign up to get started and you’ll receive a welcome email directing you to some of the best AIP resources available to help you get started. But wait, there’s more! I also provide a link to my newsletter archives where you’ll find all of my past recipe round ups and seasonally appropriate tips and advice to set you up for AIP success.
Enjoy! ♥

 More Recipe Round-Ups From My Blog:

Lovebird Cereal Recipes
Plenty of Plantains – More than 200 AIP plantain recipes sorted by color!
Snack Guide