This post contains affiliate links. Click here to see what that means.
When you start the AIP you’re likely going to read a LOT about bone broth and the gut-healing benefits. You may even be encouraged by your health coach, nutritionist or functional medicine practitioner to start with a very limited diet that includes homemade bone broth as part of a nutrient-dense, healing diet while you give your body a chance to heal.
For some, this is a daunting thought – home-made broth, sourcing high-quality ingredients, the time involved … Yikes!
Don’t freak out though, it’s not really that hard, and there are excellent options below if you just can’t bring yourself to make your own.
Hold tight … this is gonna be a long one! We’re going to cover everything from soup to nuts (errrr, tigernuts?) in this FAQ post.
Here we go!
Bone Broth FAQs
What are the benefits of bone broth?
Bone broth is a nutrient-dense food that provides collagen and gelatin, along with amino acids such as glycine and proline. These amino acids are important building blocks for connective tissue and are involved in maintaining and repairing tissues throughout the body.
The gelatin and collagen in bone broth are particularly interesting when you’re following the AIP because of their role in supporting the gut lining. Glycine and proline are also involved in digestion, immune function and tissue repair, which is one reason bone broth has traditionally been considered such a valuable food for supporting gut health and healing.
Bone broth also contains minerals such as calcium, phosphorus, magnesium and potassium, although the amounts can vary considerably depending on the bones used and how the broth is prepared. I wouldn’t rely on bone broth as your primary source of minerals, but they are certainly a welcome bonus.
Bone broth also contains compounds such as chondroitin sulfate and glucosamine, which are well known for their potential role in supporting healthy joints. Collagen-rich foods have also been studied for their potential benefits for joint discomfort, bone health and the health of skin, hair and nails.
In other words, there’s a good reason bone broth has been such a staple in traditional cooking for generations. It’s an easy way to add collagen, gelatin and amino acids to your diet, while also making use of parts of the animal that might otherwise go to waste.
Can I buy broth from the grocery store?
Well … sort of. If you’re following the AIP, you do need to be a little more particular about the broth you buy.
Most of the chicken or beef broth you’ll find in a regular grocery store isn’t what I’m talking about when I recommend bone broth. Many conventional broths are relatively thin and don’t contain much gelatin, and some contain ingredients that aren’t AIP-compliant, such as pepper, nightshade spices, or other additives, flavorings, and even preservatives that may contain gluten. So don’t just grab the first carton that says “broth” or “stock” on the label and assume it’s suitable for the AIP.
What we’re looking for is a true bone broth, ideally one that’s made with bones and connective tissue and cooked long enough to extract the collagen and gelatin. That’s the good stuff we’re after!
If you don’t have the time, inclination, or freezer space to make your own, don’t despair. There are some excellent commercially prepared bone broths available. You’ll generally have better luck finding them at natural or specialty grocery stores, such as Whole Foods, or ordering directly from specialty retailers online.
And this is one place where I’m happy to help you do the shopping! I’ve put together AIP-friendly options in my Amazon AIP Storefronts, and you’ll also find some of the brands I recommend below. Just remember that formulations can change, so always check the ingredient list before buying.
Homemade is still my first choice because you control the ingredients and can make a beautifully concentrated broth for considerably less money. But a good-quality, AIP-compliant store-bought bone broth is a perfectly reasonable shortcut when homemade isn’t happening. Sometimes convenience is exactly what we need to keep moving forward.
Where do I get bones?
Your local butcher, a local farm (ask around at the farmers market), a friendly hunter, your local health food store or even an Asian market. You can also save the bones if you roast a whole chicken, turkey, duck, or goose. In fact, don’t overlook the bones left over from bone-in steaks, ribs, pork chops, etc. Toss them into a freezer bag and save them until you have enough for a batch of broth.
 If you’re buying bones, ask your butcher or farmer if they sell them in bulk. You may be surprised at what they have available! Sometimes bones are sold as “soup bones” or even “pet food bones.” Beef knuckle bones are particularly good for making broth, and chicken feet, beef feet or oxtail will give you plenty of gelatin.
Don’t have a good local source? My affiliates at US Wellness Meats offer some excellent options. Shop here and save 15% with my code: AIP15
Do I have to use grass-fed or pastured bones, or organic bones?
Ideally, yes. When you’re making a concentrated food like bone broth, I think it’s worth seeking out the best-quality bones you can reasonably afford. Look for bones from grass-fed, pasture-raised, and/or organically raised animals when possible.
That doesn’t mean you need to panic if you can’t find or afford the perfect bones (I know, they’re not cheap!). Bone broth is still a wonderfully nourishing food, and I’d rather see you make broth with the bones you can get than never make it because you couldn’t find the “right” ones. If you have a choice, though, I’d choose bones from healthy, well-raised animals.
Your local farmer or butcher is a great place to start. And if you’re buying bones in bulk, ask about how the animals were raised. You may find that the bones are surprisingly affordable, especially when you’re buying directly from the source.
What kind of bones should I use?
You can use bones from just about any animal—beef, veal, lamb, bison or buffalo, venison, chicken, duck, goose, turkey, pork, or fish. And don’t worry about finding the “perfect” bones. A variety is actually a good thing!
If you’re buying bones specifically for broth, I like to use a combination of meaty bones, marrow bones, and gelatinous bones. Meaty bones add flavor, marrow bones provide nutrient-rich marrow, and bones with lots of connective tissue and cartilage—such as knuckles, oxtail, and chicken or pork feet—are particularly good sources of collagen and gelatin.
You can mix and match bones in the same batch of broth … some beef, some lamb, some chicken … but be aware that it will change the flavor. Most folks prefer to stick to one animal source at a time.
Top Tips:
- You can reuse bones after they’ve made a batch of broth. If they’re still intact, save them for another batch, but ideally you’ll want to add some fresh bones as well. This will help maintain the flavor and give you more fresh cartilage and connective tissue to contribute collagen and gelatin to the finished broth.
- You can repurpose cooked bones from other meals. Save the bones left over from cooking bone-in meat (hello chicken from Sunday supper, Thanksgiving turkey or bone-in ham!) and keep them in a bag in the freezer. Once you’ve accumulated enough, toss them into your next batch. Mickey Trescott says she does exactly this, and I’ve always loved that approach because it makes good use of something you’d otherwise throw away.
What about the old concerns about bone broth?
You may have also heard some of the older warnings that bone broth is “dangerous” because of the fat, glutamate, or heavy metals that might be released from the bones. These concerns made the rounds quite a bit online, particularly in the early days of the AIP.
The research doesn’t support the idea that properly prepared bone broth is inherently dangerous because of these concerns. Studies have found that bone broth does contain glutamic acid, but that doesn’t mean it contains dangerous amounts of free glutamate or that the glutamate will somehow bypass your body’s normal regulation. Likewise, although lead can be detected in some bone broths, the amounts found in the studies that prompted these concerns were not at levels considered unsafe for drinking water.
That said, quality still matters. Choosing bones from well-raised animals and using good-quality water are sensible precautions, particularly if you’re making broth regularly. And if bone broth consistently makes you feel unwell, don’t force yourself to drink it simply because it’s considered a “healing” food. Individual food sensitivities are a real thing.
Do I have to skim the fat?
Only if you want to. Feel free to drink your broth as-is, or skim off some or all of the fat if you prefer a less fatty broth.
After you’re done cooking, strain your broth as usual and let it cool in the fridge for several hours. The fat will rise to the top and harden, making it easy to scrape off with a spoon.
You don’t have to remove every last bit, though. A little fat floating on the surface is perfectly fine.
Personally, I like to remove most of the fat before drinking my broth. I don’t worry about getting every last little bit of it I’m going to be using it in other recipes. There’s honestly no need to make yourself crazy over it!
What kind of ingredients can I add to my broth to help with the flavor?
Before we get into flavor, ask yourself what you’re going to use the broth for.
If you’re going to be using it in other dishes, there’s something I really like about Mickey Trescott’s approach to bone broth. Her idea is that rather than loading your broth up with lots of herbs, spices, and vegetables while it’s cooking, you make a basic, neutral broth that you can use in all sorts of ways later. Then, when you’re ready to drink it or use it in a recipe, you can season it according to what you’re making.
A neutral broth can become soup, gravy, sauce, or simply a warm mug of broth without the flavor of rosemary, sage, or ginger dictating where you can use it.
However! That doesn’t mean you can’t add things while your broth is cooking. Especially if you’re like me and you tend to make whole batches just for sippin’!
If you like a more flavorful broth right from the start, there are plenty of AIP-friendly options to add:
- Onion
- Green onion
- Leek
- Carrot
- Garlic
- Celery
- Salt
- Parsley
- Bay leaf
- Rosemary
- Thyme
- Sage
- Ginger (my fave!)
If you’re following the Core AIP, remember that some seasonings you might normally reach for, such as black pepper, peppercorns, and red pepper flakes, aren’t included during elimination. If you’ve reintroduced them or you’re following a Modified AIP approach, your options may be different.
So there’s really no right or wrong answer here. Keep it basic if you want a versatile base broth, or add some flavor if that’s how you prefer it … You do you!
Budget Friendly Tip: I personally like to keep a bag of veggie scraps in the freezer and toss them into my broth when I’m making a batch. It’s an easy way to add some flavor and make use of things that might otherwise end up in the compost.
Why add vinegar to the broth?
Adding an acid, like lemon juice or vinegar, will help to extract minerals from the bones. Use a mild-flavored vinegar, like apple cider vinegar, as white vinegar may taste too harsh in a mellow broth, not to mention it’s not included during the elimination stage of the AIP.
You don’t need much. A splash is all you need to help with the mineral extraction without making your broth taste like vinegar!
Should I roast my bones first?
You can, but you don’t have to!
Roasting the bones first will give your broth a deeper, richer flavor and darker color, but it doesn’t make the broth more nutritious, so it really isn’t necessary.
Personally, I don’t bother unless I’m using something like beef bones. It’s an extra step, and I prefer to work smart, not hard!
If you’d like to roast them, spread the bones on a baking sheet and roast at 350°F for about 30 minutes before adding them to your pot.
Does it really have to jiggle?
If you’ve ever put your cooled bone broth in the fridge and discovered that it has turned into a wobbly, jiggly, almost Jell-O-like substance, congratulations! That’s the jiggle we’re looking for.
That lovely wobble comes from gelatin, which forms when collagen from the bones and connective tissue breaks down during cooking. When the broth is warm, the gelatin is dissolved in the liquid, so your broth will look … well, like broth. Once it cools, the gelatin sets and gives you that characteristic jiggle.
But don’t panic if your broth doesn’t gel! A broth that stays liquid when refrigerated isn’t a failure, and it doesn’t mean there’s no gelatin in it. How much gelatin ends up in your broth depends on the types and amount of bones you use, as well as how much water you add. Bones with lots of connective tissue and cartilage, such as feet, knuckles, and oxtail, are especially good choices if you’re after a nice, gelatinous broth.
You can also concentrate your broth by simmering it uncovered for a while after cooking to allow some of the water to evaporate. This can help give you that thicker, more concentrated result.
And remember, the jiggle isn’t the goal all by itself. Don’t toss a perfectly good batch of broth just because it didn’t turn into Jell-O in your refrigerator. Drink it, cook with it, and try adding more gelatinous bones or less water next time if you want more jiggle.
How long should I cook my bone broth?
It really depends on how you’re making it! There’s no magic number of hours that applies to every pot of bone broth, and just about every recipe recommends something different. Here are a few general guidelines:
On the stovetop: Plan on a good long simmer. Around 8–24 hours is a reasonable range for beef, chicken, pork, and other meat bones. You can certainly stop sooner if your broth looks and tastes good, but longer cooking gives the connective tissue more time to break down. Keep an eye on the water level if you’re cooking for many hours, especially if your pot doesn’t have a tight-fitting lid.
In a pressure cooker or Instant Pot: This is where things get considerably faster (and the main reason I decided to invest in an Instant Pot). About 90 minutes at high pressure is enough for a good batch of bone broth, according to Mickey Trescott. She has also said that she doesn’t find much benefit in extending the cooking time beyond about two hours, which is good to know … because I tend to go overboard and max it out at four!
In a slow cooker: You can use the same basic idea as stovetop cooking and let your broth simmer for many hours. The advantage here is mostly convenience: set it up and let it do its thing while you get on with your day. Just make sure you follow your slow cooker’s instructions and keep an eye on the liquid level during a long cook.
Fish bones are a different story. They’re much smaller and more delicate, so they don’t need anywhere near as long. Mickey recommends roughly 30–45 minutes for fish broth.
And remember what we talked about above: don’t judge your broth solely by the clock. If you’ve cooked it long enough to get the flavor, body, and concentration you’re after, you’re good to go. If it doesn’t gel when chilled, that doesn’t necessarily mean it needed another twelve hours in the pot!
What about histamine?
You may have heard that bone broth cooked for many hours is automatically high in histamine. This is a common claim, but the science isn’t quite that straightforward, and there isn’t a well-established cooking time at which bone broth suddenly becomes “high histamine.”
That said, if you know you’re sensitive to histamine, you may find that shorter-cooked broth works better for you. Pressure cooking is one option to get a flavorful, gelatin-rich broth in considerably less time. It’s also a good idea to cool and refrigerate or freeze your finished broth promptly rather than letting it sit in the fridge for days.
As with so many things on the AIP, pay attention to how your body responds. If a 24-hour pot of bone broth leaves you feeling lousy, you don’t need to force yourself to drink it just because someone on the internet says longer is better!
What do I do with my broth?
Congratulations!! You made your first batch of bone broth … now what!?
The simplest answer? Drink it!
Pour yourself a mug, warm it gently if you’re not taking it straight out of the pot, and sip it just as you would tea or coffee. You can add a little salt or season it to taste, especially if you’ve made a fairly neutral base broth.
Confession time. I have to admit that when I was first diagnosed with my autoimmune digestive disorder I couldn’t stomach the thought of making or consuming bone broth … even though it was the most delicate choice on the menu at the time. If this is you, be sure to zhuzh it up! My favorite add-in is a small nub of ginger during the cooking phase. If you didn’t do that, try some ground ginger and powdered garlic … maybe a little extra salt. I also enjoy mine more when it’s not piping hot, and my body even craves it now! If it’s not love at first sip, don’t throw it out!
Drinking it isn’t your only option. Bone broth is incredibly useful in the kitchen and can be used anywhere you’d normally use stock or broth, and honestly, soooo many recipes call for a splash here and there! You can also sub it into savory dishes that call for water, and yes, you can even use it in an AIP smoothie! … say what!?
Try it in:
- Soups and stews
- Gravies and sauces
- Braises
- Cooking vegetables
- Cooking meat
- Making mashed vegetables
- For cooking rice or other pseudograins, if they’re part of your diet
TIP: If you’ve made a concentrated broth, you can dilute it with a little water when you need a larger amount than you have on hand.
What is meat stock?
You may also come across the term meat stock when you’re researching bone broth. So what’s the difference?
Meat stock is similar to bone broth, but it’s cooked for a much shorter time and is made with a higher proportion of meat to bone.
While bone broth is typically simmered for many hours to extract collagen, gelatin, and other compounds from the bones, meat stock is usually ready in just a few hours and relies on flavor from the meat itself.
You’ll sometimes see meat stock recommended as an alternative to bone broth, but they’re really two different preparations, each with its own place in the kitchen. Just remember, meat stock isn’t what we’re after when we’re talking about bone broth.
If you’d like to try meat stock, I’ve included a recipe in the recipe section below. Sometimes it’s nice to have options!
A big problem I have with meat stock is the cost. Typically bones are more budget-friendly, so there’s that! If you make meat stock and want to stretch your dollar, try this!
Remouillage is the traditional technique of making a second, lighter stock from bones that have already been used. Learn more about remouillage and get an easy recipe here. Just leave out the tomato paste to keep it AIP-friendly.
How should I store my broth?
Once you’ve made your broth, you’ll want to get it cooled and stored properly. If you’ve made a big batch, divide it into smaller containers so it cools more quickly, and get it into the refrigerator or freezer promptly. Safe food handling recommendations advise meat broth, stock and gravy can be stored in the refrigerator for 3–4 days.
For the refrigerator, my go-to is glass Mason jars with sealing rings. I like them because they’re reusable, easy to label, and the tight seal helps protect the broth from air and other refrigerator odors while keeping it nice and fresh. I find that a good seal helps me extend my storage time, but don’t risk it!
If you aren’t going to use your broth within a few days, freeze it.
For the freezer, I love Souper Cubes. They’re designed for freezing food in convenient portions, so you can freeze your broth, pop out what you need, and leave the rest in the freezer. They come in several sizes, which is especially handy because not every recipe calls for the same amount of broth.
If you prefer to freeze your broth in glass jars, there are a few important things you need to know. I’ve covered all of those tips and tricks in my Food Storage Basics post, so be sure to have a look before you decide what containers to buy.
When it comes to freezer storage, food safety guidelines recommend using frozen meat broth within 4–6 months.
One last tip: Label your containers with the date before they go into the freezer. Future-you will thank you!
Bone Broth Recipes
Chicken Bone Broth (be sure to use the giblets, etc. for nutrient density and flavor)
Fish Bone Broth
Beef Broth (lamb can be used too)
Instant Pot Bone Broth
Instant Pot Beef Bone Broth (my favorite!)
Veggie Bone Broth
Meat Stock
Turmeric Ginger Bone Broth Smoothie Bowl (check my coupons for up to 35% off the collagen you need for this recipe)
Blueberry Cardamom Bone Broth Smoothie (omit cardamom unless you’ve reintroduced, and get a discount on protein powder here)
For More Bone Broth Recipes and ways to use it (soups, stews, smoothies and more) please use the group search function in my AIP Recipe Collection Facebook Group.
No Time for Bone Broth?
Many people tell me they just don’t have time to make bone broth or they just can’t stand the whole process. Fortunately, there are some options for quality bone broths that are AIP compliant.
Perfect Supplements carries powdered bone broth and so much more! Shop with my link and Code AIP10 to SAVE 10% … AND MORE on VOLUME discounts of Perfect Brand products!
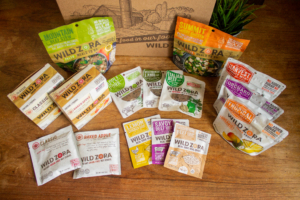
Wild Zora offers wildly DELICIOUS pre-made freeze-dried soups and stews! They don’t have plain bone broth but thought I’d recommend them here since so many that are prepping bone broth are using it to make their own homemade soups and stews or are looking for on-the-go convenience.
(Be sure to grab a coupon code from our coupons page.)
More pre-made bone broth suggestions on Amazon – USA / Canada / UK

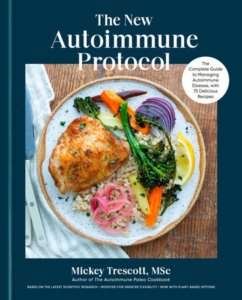 My #1 Recommendation: The New Autoimmune Protocol (Releasing May 26, 2026)


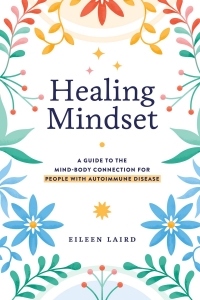 Another amazing resource that I highly recommend you check out is the book by Eileen Laird called “Healing Mindset.”