Tag Archive for: FAQ

This post contains affiliate links.  Click here to see what that means.

How to Manage the AIP in an Emergency

Whether you live in an area prone to tropical storms, earthquakes and wildfires or not, this post is important for anyone on a restricted diet. (Note, you may also want to read my article on the AIP & COVID-19 for more advice and support)

Wait! What are we talking about here? This topic could easily be misconstrued by readers, because let’s face it, an emergency when you’re on the AIP could simply mean having no energy to cook or to go to the grocery store! Keep reading … some of these emergency tips and suggested rations to have on hand could be a different kind of “life saver” when you’re worn out or in a rush.

Now … Back to our regularly scheduled PSA!

Most governments these days suggest that folks keep a “Go Bag” or “Bug Out Bag” and that they have emergency rations on hand in the event of power outages or emergency evacuations. Do you take it seriously? Do you have a go-bag with emergency AIP food you can safely eat?

As with everything on the AIP, preparation is key, so I’m hoping this post will help you to prepare in advance so you won’t experience additional stress in the case of an emergency.

Below is a list of some AIP rations I suggest keeping on hand at all times along with your family’s standard rations like water, first aid kits, a change of clothing, etc. There are lots of great Bug Out Bag prep lists on the internet – use Google to find a list of essentials suitable for your location and family.

Advice from an AIP Authority

The following is from an Instagram post Angie Alt shared a while back. If you don’t already follow her, you should – she’s awesome! I love her funny and sometimes pointed posts, and in her usual style she nailed this topic too. ♥ Here’s what she wrote:

PSA – PUBLIC SERVICE ANNOUNCEMENT:

In an emergency situation you just do whatever is necessary to be safe. Period.
AIP can be an important component of your long-term health with autoimmune disease, but short-term safety beats AIP every time. Life has hierarchies.

I’m sharing this message today because over the last several years leading SAD to AIP in SIX groups we’ve had members go through all kinds of natural disasters. I wanted anyone in our community preparing for or evacuating ahead of Hurricane Florence to hear it from an “AIP Authority” that your best is good enough right now and you and your family’s safety is priority number one .. 100%

That said, here are some resources that might help should any of you need them.

AIP Hurricane Prep – Video

Thank you @wendisaipkitchen – Sending the best vibes for safety and little to no damage for all the folks facing this right now. The AIP community is thinking of you. ♥

Recommended Emergency Rations

MEAT SNACKS & BONE BROTH

Meat Snacks
Bone Broth, Soups & Stews

Perfect Supplements – Powdered Bone Broth – Beef or Chicken – Just search “broth” (Save 10% off EVERY order with CODE: AIP10 + STACK my coupon on VOLUME discounts of Perfect Brand products!)

FREEZE DRIED AIP MEALS, SOUP, STEW & SNACKS

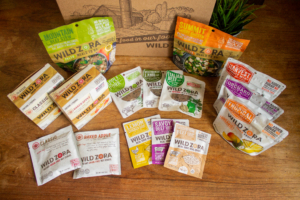
Wild Zora – Delicious Freeze-Dried Stew, Soup, Meat Bars & Fruit Snacks – Shop the AIP Compliant menu
Wild Zora even offers BULK Shopping Offers to help you stock your pantry with their shelf-stable AIP Compliant products at a discounted rate AND free shipping!  SAVE 15% off with code: ZORAFAM15 (excludes bulk boxes).

SHELF-STABLE FOOD POUCHES

Serenity Kids – Shelf-stable, nutrient-dense, top-quality baby food (meat, veg and fruit) in sustainable pouches – they’re suitable for babies, kids, adults and even pets! 

AIP SHOPS ON AMAZON – PACKAGED AIP SNACKS & MORE! 

Since I know a lot of folks shop on Amazon, I’ve gone to great lengths to set up my own shops with AIP compliant items to make your life a lot easier! As always, check ingredient lists (I have before I added them to my recommendations, but products change from time to time, so always be safe!).

Amazon USA / Amazon Canada / Amazon UK

Experts, Support Groups & Meet-Ups

While I’m not a huge one for “support” groups sometimes you just need someone to bounce things off of, ask questions, get a little motivation and most importantly not feel like you’re all alone.

I have just one word of warning for you on support groups – always be sure to educate YOURSELF and do NOT rely on information you receive in support groups as the be-all, end-all word on any topic.  You should always seek appropriate medical guidance or nutritional assistance over advice you find in support groups.  I’m saying this here because I’ve left many support groups because of wildly varying and inaccurate advice – I think they can be very dangerous and prefer to do my own research within the parameters of experts I trust, and when necessary discuss my concerns with the experts. You should know that even groups put together by the experts openly admit that they are NOT closely moderated, and that they rely on “peer-support” – so please BEWARE!

That said, I’m going to start with where to find expert advice.  Sadly you may have to search further than your G.P. or medical specialist.

Experts

Reliable Advice Online
There’s a LOT of information out there … and while Google is a wonderful thing, it is so easy to spend copious amounts of time trying to sift through the good, the bad and the down-right scary!  I can tell you from experience you’re better off to find a few exceptional resources and stick to them like glue for your information.  Sure, from time to time you may need to branch out, but if you have a solid foundation of online resources that you know are reliable you’ll save yourself valuable time and precious energy.

My top-2 recommendations for exceptional, reliable AIP information online are:
Autoimmune Wellness
Phoenix Helix

You’ll find a few key articles on the Resources Page listed under the title Advice for Beginners.

Functional Medicine Practitioner
As with any significant dietary change, you should in fact only undertake the AIP at the recommendation of a trained nutritional coach or physician.

If you’ve only started on the AIP due to personal research and you’re unsure whether it’s right for you and your condition, I highly recommend you seek the advice of a Functional Medicine Practitioner.  You can find one near you using this listing – Functional Medicine Practitioner Listing, and you can read more about it here in my post – Finding Your Root Cause.

Paleo-Friendly Autoimmune Specialist MDs
Yes, they do exist, but they can be hard to find. Thankfully, Eileen at the Phoenix Helix has complied and maintains a list on her website – check it out here.

Personal AIP Health Coaches
If you know you need to be on an AIP diet but are struggling to personalize it to your own needs and health condition, you may want to consider the services of a Health Coach.  This listing will take you to a list of coaches certified by the experts in the Autoimmune Protocol – Certified AIP Health Coach Listing.

AIP Coaching Programs
Beyond hiring a personal AIP Health Coach there are some options for joining online guided group support programs. There are three that I recommend, plus one for autoimmune exercise – you can learn more about them on my Coaching Page.  The one you choose will depend largely on your comfort level with making diet and lifestyle changes and whether you’re a self-starter or need more of a support group surrounding you.

AIP Medical Research
I get asked by a lot of members joining our Facebook Group as to whether there is really any proof that the AIP works for autoimmune disease, and I always reply with an emphatic, YES! If you’re interested in learning more about the medical studies that have been conducted about the efficacy of the AIP, you can keep up to date via the Autoimmune Wellness website here.

Living Matrix Health Timeline
Whether you’ve seen a Functional Medicine Practitioner yet or not, you’ve probably heard a lot about the importance of finding the “root cause” or “underlying cause” of your autoimmune disease.

To help you get the best support this little tool can help you provide your medical team with a thorough health history and potentially will help you find your root cause, making it easier to achieve healing.

The Living Matrix offers something called MyTimelineTM it’s a powerful tool that enables you to easily document the unfolding phenomena that lead to your ill health – a process that often occurs over many years, perhaps even a lifetime. It gives you and your practitioner the “Big Picture” so you can take the necessary steps to build back your health.

The process to complete your timeline can be long and require a bit of work, but it prompts you to think about your symptoms and issues and – just as importantly – when they may have begun. It also asks about key events in your life so that you can begin to see the patterns – it’s really very amazing!  The process was an eye opener to me and can really help your Functional Medicine Practitioner to quickly grasp your health history.  Click here to go to the access page and get started building your own timeline (don’t be afraid to add extra details you feel are important) – you’ll even be able to print out a summary when you’re complete. You can read more about it here in my post – Finding Your Root Cause.

Meet Ups & Support Groups

Location Specific Groups
Looking for support and want to connect with fellow AIP-ers in your own local area? Maybe you need advice where to find AIP compliant ingredients locally but are having a hard time – who better to ask than someone that lives in your area!
Be sure to check out this comprehensive list of support groups compiled by Autoimmune Wellness … it’s wonderful!
You can find a full list here – they’re constantly updating this, so just select the latest list.

Basic AIP Support Groups – NOT closely moderated – they all leave me wishing I could find a good one to suggest to you:
AIP Support
Strict AIP Support A-Z
AIP Elimination Diet Support Group

Topic-Specific Groups
Emotional Autoimmunity Website – Navigating the Emotional Side of Life with Chronic Illness – there used to be a support group but it has been closed down – probably too much work because this one WAS closely moderated.
Facebook – AIP Instant Pot Recipes
Facebook – Coconut-Free AIP Recipes Group – If you have an allergy to coconut but need to stick to the AIP Diet, you may wish to try this group.
Facebook – AIP Canning, Preserving, Dehydrating and Fermenting 
Facebook – Low Histamine AIP
Facebook – AIP During Pregancy and Breastfeeding
Facebook – Low FODMAP Recipes & Support – NOT AIP but you may find it helpful

Motivation

If you haven’t already read my motivational message, be sure to visit the page by clicking this link.  It may just be what you need for a little pick-me-up, and it also directs you to my article on the stages of grieving over illness.

This post contains affiliate links.  Click here to see what that means.

Managing a restricted diet while travelling is a hot topic.  Thankfully there are plenty of resources to help you make your next trip a success.  Below you’ll find a collection of great tips and tricks for how to stick to the AIP when you’re away from home.  What ever you do don’t leave home without preparing … you can’t count on finding AIP compliant food on your travels.


“Failing to plan is planning to fail.”

Conveniences:

AIP Meal Service! Autoimmune Protocol meal made by real chefs delivered to your door. SAVE with my couponWhen you’re on the road or enjoying a holiday, the last thing you want to do is cook — but staying AIP compliant is still important. That’s where Urban AIP comes in. Simply pack a cooler full of their hand-prepared, nutrient-dense, flash frozen meals to give yourself a real break from the kitchen without compromising your protocol. Sure, it’s a little more than stopping at your local fast-food joint, but your health is worth it, and having nourishing meals ready to go makes travel a whole lot easier — and a lot more enjoyable. 

Wild Zora AIP foods on the go https://www.awin1.com/cread.php?awinmid=78890&awinaffid=2234611 - aiprecipecollection.comLooking for more great convenience foods to pack for your travels, visit our Food Sourcing page for lots more great ideas and reliable AIP shops – in this case, be sure to check out Wild Zora (they have some very tasty free-dried AIP stews, soups, instant no-oatmeal, meat bars, etc.), Serenity Kids food pouches make great snacks for kids AND adults, my AIP Amazon Storefronts.

You can find more ideas and discounts in my AIP Snack Guide – click here, and be sure to check out my AIP Amazon Storefronts too – you’ll find snacks, pantry items and sustainable living options for your travels, like stainless steel bento box sets, electric lunch boxes and so much more!  Shop Here: USA / Canada / UK

Self-Catered Vacations:

Since I went gluten-free many years ago I’ve found vacations much more enjoyable when I know I’m in complete control of my food.  One way we do that is to take self-catered vacations.  You can read more about this on our travel blog – What’s Your Holiday Style? ❀ All-Inclusive ❀ Hotels & Restaurants ❀ Self-Catered ❀ and an early article I wrote about Travelling with Food Allergies.  I really do need to write a dedicated post about travelling while on the AIP … one day!

For us, Airbnb, Booking.com and Cottage Rentals have been a life saver!  Having a fully equipped comfortable kitchen in our own little cottage or apartment makes all the difference in the world … and we’ve enjoyed travelling in Canada, USA, the Caribbean and Europe all while sticking to my restricted diet. 

I’ve also found a very helpful group on Facebook that you may want to consult for some details and suggestions on various destinations – Allergy Travel Groups helped me a lot when it came to taking food on the plane for International travels, and they’re helpful for lots of suggestions!

Looking for more articles and tips?

Dining Out on the AIP
Surviving Social Life on the AIP
AIP in an Emergency – Tips for Power Outages & Natural Disasters – Might help campers too! 

Autoimmune Wellness:

Travel Food Tips While On The AIP
Guide to AIP Travel:  Road Trips
Guide to AIP Travel:  Flying
Guid to AIP Travel: International Trips
Seven Reasons Why Camper Van Travel is Compatible with the AIP

Phoenix Helix:

Miscellaneous Sources:

Navigating a Cruise on the AIP
How to Eat Healthy While Travelling on a Restricted Diet

Recipes:

You guessed it, try our searchable Facebook Group – click these quick links for #onthego #travel #snacks to get started. Sign up here, and try searching for specific recipes such as fat bombs, muffins, meatballs, jerky, granola, etc. You’ll even find campfire bananas, s’mores and more – The options are endless!


You’ll hear me say it again and again, “Failing to plan is planning to fail.” There’s seriously nothing worse than getting caught completely exhausted with nothing to eat and nourish yourself.

Batch cooking and meal planning are two wonderful ways to make your AIP life easier!

Love it or hate it, on this protocol we all have to cook. If you want to cut down on the days you spend in the kitchen – learn to incorporate batch cooking and meal planning into your life.

Success on the AIP is so much easier when you have a few good tips, tricks and tools under your belt (spoiler alert – there’s an app that’s a game-changer on the AIP – RealPlans and you can read about it in my review here) it could save your sanity on the AIP! Visit my Meal Planning page – click here for lots of information and resources.

Where Else Can I Find Meal Prep & Batch Cooking Recipes?

Many recipes can be adapted for batch cooking just by doubling the quantities.  Some are perfect for dividing up into pre-portioned containers (meal prepping) for lunches, breakfasts and snacks on the go.  With the AIP you’ll find the need to think outside the box a little, but once you get used to it you’ll find it a breeze!

For more batch cooking recipe ideas, try searching in our Facebook Group – try search terms like “batch cook” or “sheet pan” or “freezer dump” or “meal prep” or simply look for things like whole roasted chicken or beef roasts and sides that can be used for multiple purposes or portioned out for later use.

For detailed posts about freezer cooking and batch cooking, check out Mickey Trescott’s AIP Freezer Cooking Guide, and Batch Cooking 101 – she’s my go-to on the topic if you want some great tips and tutorials. You’ll also enjoy the post by Angie Alt, Time Management in the Kitchen. These great extra tips and tricks will help you even more and be applied within your RealPlans app… You honestly can’t help but be winning at the AIP by pairing this combo!

This post contains affiliate links.  Click here to see what that means.

When you start the AIP you’re likely going to read a LOT about bone broth and the gut-healing benefits.  You may even be encouraged by your health coach, nutritionist or functional medicine practitioner to start with a very limited diet that includes homemade bone broth as part of a nutrient-dense, healing diet while you give your body a chance to heal.

For some, this is a daunting thought – home-made broth, sourcing high-quality ingredients, the time involved … Yikes! 

Don’t freak out though, it’s not really that hard, and there are excellent options below if you just can’t bring yourself to make your own.

Hold tight … this is gonna be a long one! We’re going to cover everything from soup to nuts (errrr, tigernuts?) in this FAQ post.

Here we go!

Bone Broth FAQs

What are the benefits of bone broth?

Bone broth is a nutrient-dense food that provides collagen and gelatin, along with amino acids such as glycine and proline. These amino acids are important building blocks for connective tissue and are involved in maintaining and repairing tissues throughout the body.

The gelatin and collagen in bone broth are particularly interesting when you’re following the AIP because of their role in supporting the gut lining. Glycine and proline are also involved in digestion, immune function and tissue repair, which is one reason bone broth has traditionally been considered such a valuable food for supporting gut health and healing.

Bone broth also contains minerals such as calcium, phosphorus, magnesium and potassium, although the amounts can vary considerably depending on the bones used and how the broth is prepared. I wouldn’t rely on bone broth as your primary source of minerals, but they are certainly a welcome bonus.

Bone broth also contains compounds such as chondroitin sulfate and glucosamine, which are well known for their potential role in supporting healthy joints. Collagen-rich foods have also been studied for their potential benefits for joint discomfort, bone health and the health of skin, hair and nails.

In other words, there’s a good reason bone broth has been such a staple in traditional cooking for generations. It’s an easy way to add collagen, gelatin and amino acids to your diet, while also making use of parts of the animal that might otherwise go to waste.

Can I buy broth from the grocery store?

Well … sort of. If you’re following the AIP, you do need to be a little more particular about the broth you buy.

Most of the chicken or beef broth you’ll find in a regular grocery store isn’t what I’m talking about when I recommend bone broth. Many conventional broths are relatively thin and don’t contain much gelatin, and some contain ingredients that aren’t AIP-compliant, such as pepper, nightshade spices, or other additives, flavorings, and even preservatives that may contain gluten. So don’t just grab the first carton that says “broth” or “stock” on the label and assume it’s suitable for the AIP.

What we’re looking for is a true bone broth, ideally one that’s made with bones and connective tissue and cooked long enough to extract the collagen and gelatin. That’s the good stuff we’re after!

If you don’t have the time, inclination, or freezer space to make your own, don’t despair. There are some excellent commercially prepared bone broths available. You’ll generally have better luck finding them at natural or specialty grocery stores, such as Whole Foods, or ordering directly from specialty retailers online.

And this is one place where I’m happy to help you do the shopping! I’ve put together AIP-friendly options in my Amazon AIP Storefronts, and you’ll also find some of the brands I recommend below. Just remember that formulations can change, so always check the ingredient list before buying.

Homemade is still my first choice because you control the ingredients and can make a beautifully concentrated broth for considerably less money. But a good-quality, AIP-compliant store-bought bone broth is a perfectly reasonable shortcut when homemade isn’t happening. Sometimes convenience is exactly what we need to keep moving forward.

Where do I get bones?

Your local butcher, a local farm (ask around at the farmers market), a friendly hunter, your local health food store or even an Asian market. You can also save the bones if you roast a whole chicken, turkey, duck, or goose. In fact, don’t overlook the bones left over from bone-in steaks, ribs, pork chops, etc. Toss them into a freezer bag and save them until you have enough for a batch of broth.

If you’re buying bones, ask your butcher or farmer if they sell them in bulk. You may be surprised at what they have available! Sometimes bones are sold as “soup bones” or even “pet food bones.” Beef knuckle bones are particularly good for making broth, and chicken feet, beef feet or oxtail will give you plenty of gelatin.

Don’t have a good local source? My affiliates at US Wellness Meats offer some excellent options. Shop here and save 15% with my code: AIP15

Do I have to use grass-fed or pastured bones, or organic bones?

Ideally, yes. When you’re making a concentrated food like bone broth, I think it’s worth seeking out the best-quality bones you can reasonably afford. Look for bones from grass-fed, pasture-raised, and/or organically raised animals when possible.

That doesn’t mean you need to panic if you can’t find or afford the perfect bones (I know, they’re not cheap!). Bone broth is still a wonderfully nourishing food, and I’d rather see you make broth with the bones you can get than never make it because you couldn’t find the “right” ones. If you have a choice, though, I’d choose bones from healthy, well-raised animals.

Your local farmer or butcher is a great place to start. And if you’re buying bones in bulk, ask about how the animals were raised. You may find that the bones are surprisingly affordable, especially when you’re buying directly from the source.

What kind of bones should I use?

You can use bones from just about any animal—beef, veal, lamb, bison or buffalo, venison, chicken, duck, goose, turkey, pork, or fish. And don’t worry about finding the “perfect” bones. A variety is actually a good thing!

If you’re buying bones specifically for broth, I like to use a combination of meaty bones, marrow bones, and gelatinous bones. Meaty bones add flavor, marrow bones provide nutrient-rich marrow, and bones with lots of connective tissue and cartilage—such as knuckles, oxtail, and chicken or pork feet—are particularly good sources of collagen and gelatin.

You can mix and match bones in the same batch of broth … some beef, some lamb, some chicken … but be aware that it will change the flavor. Most folks prefer to stick to one animal source at a time.

Top Tips:

  • You can reuse bones after they’ve made a batch of broth. If they’re still intact, save them for another batch, but ideally you’ll want to add some fresh bones as well. This will help maintain the flavor and give you more fresh cartilage and connective tissue to contribute collagen and gelatin to the finished broth.
  • You can repurpose cooked bones from other meals. Save the bones left over from cooking bone-in meat (hello chicken from Sunday supper, Thanksgiving turkey or bone-in ham!) and keep them in a bag in the freezer. Once you’ve accumulated enough, toss them into your next batch. Mickey Trescott says she does exactly this, and I’ve always loved that approach because it makes good use of something you’d otherwise throw away.

What about the old concerns about bone broth?

You may have also heard some of the older warnings that bone broth is “dangerous” because of the fat, glutamate, or heavy metals that might be released from the bones. These concerns made the rounds quite a bit online, particularly in the early days of the AIP.

The research doesn’t support the idea that properly prepared bone broth is inherently dangerous because of these concerns. Studies have found that bone broth does contain glutamic acid, but that doesn’t mean it contains dangerous amounts of free glutamate or that the glutamate will somehow bypass your body’s normal regulation. Likewise, although lead can be detected in some bone broths, the amounts found in the studies that prompted these concerns were not at levels considered unsafe for drinking water.

That said, quality still matters. Choosing bones from well-raised animals and using good-quality water are sensible precautions, particularly if you’re making broth regularly. And if bone broth consistently makes you feel unwell, don’t force yourself to drink it simply because it’s considered a “healing” food. Individual food sensitivities are a real thing.

Do I have to skim the fat?

Only if you want to. Feel free to drink your broth as-is, or skim off some or all of the fat if you prefer a less fatty broth.

After you’re done cooking, strain your broth as usual and let it cool in the fridge for several hours. The fat will rise to the top and harden, making it easy to scrape off with a spoon.

You don’t have to remove every last bit, though. A little fat floating on the surface is perfectly fine.

Personally, I like to remove most of the fat before drinking my broth. I don’t worry about getting every last little bit of it I’m going to be using it in other recipes. There’s honestly no need to make yourself crazy over it!

What kind of ingredients can I add to my broth to help with the flavor?

Before we get into flavor, ask yourself what you’re going to use the broth for.

If you’re going to be using it in other dishes, there’s something I really like about Mickey Trescott’s approach to bone broth. Her idea is that rather than loading your broth up with lots of herbs, spices, and vegetables while it’s cooking, you make a basic, neutral broth that you can use in all sorts of ways later. Then, when you’re ready to drink it or use it in a recipe, you can season it according to what you’re making.

A neutral broth can become soup, gravy, sauce, or simply a warm mug of broth without the flavor of rosemary, sage, or ginger dictating where you can use it.

However! That doesn’t mean you can’t add things while your broth is cooking. Especially if you’re like me and you tend to make whole batches just for sippin’!

If you like a more flavorful broth right from the start, there are plenty of AIP-friendly options to add:

  • Onion
  • Green onion
  • Leek
  • Carrot
  • Garlic
  • Celery
  • Salt
  • Parsley
  • Bay leaf
  • Rosemary
  • Thyme
  • Sage
  • Ginger (my fave!)

If you’re following the Core AIP, remember that some seasonings you might normally reach for, such as black pepper, peppercorns, and red pepper flakes, aren’t included during elimination. If you’ve reintroduced them or you’re following a Modified AIP approach, your options may be different.

So there’s really no right or wrong answer here. Keep it basic if you want a versatile base broth, or add some flavor if that’s how you prefer it … You do you!

Budget Friendly Tip: I personally like to keep a bag of veggie scraps in the freezer and toss them into my broth when I’m making a batch. It’s an easy way to add some flavor and make use of things that might otherwise end up in the compost.

Why add vinegar to the broth?

Adding an acid, like lemon juice or vinegar, will help to extract minerals from the bones. Use a mild-flavored vinegar, like apple cider vinegar, as white vinegar may taste too harsh in a mellow broth, not to mention it’s not included during the elimination stage of the AIP.

You don’t need much. A splash is all you need to help with the mineral extraction without making your broth taste like vinegar!

Should I roast my bones first? 

You can, but you don’t have to!

Roasting the bones first will give your broth a deeper, richer flavor and darker color, but it doesn’t make the broth more nutritious, so it really isn’t necessary. 

Personally, I don’t bother unless I’m using something like beef bones. It’s an extra step, and I prefer to work smart, not hard! 

If you’d like to roast them, spread the bones on a baking sheet and roast at 350°F for about 30 minutes before adding them to your pot.

Does it really have to jiggle?

If you’ve ever put your cooled bone broth in the fridge and discovered that it has turned into a wobbly, jiggly, almost Jell-O-like substance, congratulations! That’s the jiggle we’re looking for.

That lovely wobble comes from gelatin, which forms when collagen from the bones and connective tissue breaks down during cooking. When the broth is warm, the gelatin is dissolved in the liquid, so your broth will look … well, like broth. Once it cools, the gelatin sets and gives you that characteristic jiggle.

But don’t panic if your broth doesn’t gel! A broth that stays liquid when refrigerated isn’t a failure, and it doesn’t mean there’s no gelatin in it. How much gelatin ends up in your broth depends on the types and amount of bones you use, as well as how much water you add. Bones with lots of connective tissue and cartilage, such as feet, knuckles, and oxtail, are especially good choices if you’re after a nice, gelatinous broth.

You can also concentrate your broth by simmering it uncovered for a while after cooking to allow some of the water to evaporate. This can help give you that thicker, more concentrated result.

And remember, the jiggle isn’t the goal all by itself. Don’t toss a perfectly good batch of broth just because it didn’t turn into Jell-O in your refrigerator. Drink it, cook with it, and try adding more gelatinous bones or less water next time if you want more jiggle.

How long should I cook my bone broth?

It really depends on how you’re making it! There’s no magic number of hours that applies to every pot of bone broth, and just about every recipe recommends something different. Here are a few general guidelines:

On the stovetop: Plan on a good long simmer. Around 8–24 hours is a reasonable range for beef, chicken, pork, and other meat bones. You can certainly stop sooner if your broth looks and tastes good, but longer cooking gives the connective tissue more time to break down. Keep an eye on the water level if you’re cooking for many hours, especially if your pot doesn’t have a tight-fitting lid.

In a pressure cooker or Instant Pot: This is where things get considerably faster (and the main reason I decided to invest in an Instant Pot). About 90 minutes at high pressure is enough for a good batch of bone broth, according to Mickey Trescott. She has also said that she doesn’t find much benefit in extending the cooking time beyond about two hours, which is good to know … because I tend to go overboard and max it out at four!

In a slow cooker: You can use the same basic idea as stovetop cooking and let your broth simmer for many hours. The advantage here is mostly convenience: set it up and let it do its thing while you get on with your day. Just make sure you follow your slow cooker’s instructions and keep an eye on the liquid level during a long cook.

Fish bones are a different story. They’re much smaller and more delicate, so they don’t need anywhere near as long. Mickey recommends roughly 30–45 minutes for fish broth.

And remember what we talked about above: don’t judge your broth solely by the clock. If you’ve cooked it long enough to get the flavor, body, and concentration you’re after, you’re good to go. If it doesn’t gel when chilled, that doesn’t necessarily mean it needed another twelve hours in the pot!

What about histamine?

You may have heard that bone broth cooked for many hours is automatically high in histamine. This is a common claim, but the science isn’t quite that straightforward, and there isn’t a well-established cooking time at which bone broth suddenly becomes “high histamine.”

That said, if you know you’re sensitive to histamine, you may find that shorter-cooked broth works better for you. Pressure cooking is one option to get a flavorful, gelatin-rich broth in considerably less time. It’s also a good idea to cool and refrigerate or freeze your finished broth promptly rather than letting it sit in the fridge for days.

As with so many things on the AIP, pay attention to how your body responds. If a 24-hour pot of bone broth leaves you feeling lousy, you don’t need to force yourself to drink it just because someone on the internet says longer is better!

What do I do with my broth?

Congratulations!! You made your first batch of bone broth … now what!?

The simplest answer? Drink it!

Pour yourself a mug, warm it gently if you’re not taking it straight out of the pot, and sip it just as you would tea or coffee. You can add a little salt or season it to taste, especially if you’ve made a fairly neutral base broth.

Confession time. I have to admit that when I was first diagnosed with my autoimmune digestive disorder I couldn’t stomach the thought of making or consuming bone broth … even though it was the most delicate choice on the menu at the time. If this is you, be sure to zhuzh it up! My favorite add-in is a small nub of ginger during the cooking phase. If you didn’t do that, try some ground ginger and powdered garlic … maybe a little extra salt. I also enjoy mine more when it’s not piping hot, and my body even craves it now! If it’s not love at first sip, don’t throw it out!

Drinking it isn’t your only option. Bone broth is incredibly useful in the kitchen and can be used anywhere you’d normally use stock or broth, and honestly, soooo many recipes call for a splash here and there! You can also sub it into savory dishes that call for water, and yes, you can even use it in an AIP smoothie! … say what!?

Try it in:

  • Soups and stews
  • Gravies and sauces
  • Braises
  • Cooking vegetables
  • Cooking meat
  • Making mashed vegetables
  • For cooking rice or other pseudograins, if they’re part of your diet

TIP:  If you’ve made a concentrated broth, you can dilute it with a little water when you need a larger amount than you have on hand.

What is meat stock?

You may also come across the term meat stock when you’re researching bone broth. So what’s the difference?

Meat stock is similar to bone broth, but it’s cooked for a much shorter time and is made with a higher proportion of meat to bone.

While bone broth is typically simmered for many hours to extract collagen, gelatin, and other compounds from the bones, meat stock is usually ready in just a few hours and relies on flavor from the meat itself.

You’ll sometimes see meat stock recommended as an alternative to bone broth, but they’re really two different preparations, each with its own place in the kitchen. Just remember, meat stock isn’t what we’re after when we’re talking about bone broth.

If you’d like to try meat stock, I’ve included a recipe in the recipe section below. Sometimes it’s nice to have options!

A big problem I have with meat stock is the cost. Typically bones are more budget-friendly, so there’s that! If you make meat stock and want to stretch your dollar, try this!

Remouillage is the traditional technique of making a second, lighter stock from bones that have already been used. Learn more about remouillage and get an easy recipe here. Just leave out the tomato paste to keep it AIP-friendly.

How should I store my broth?

Once you’ve made your broth, you’ll want to get it cooled and stored properly. If you’ve made a big batch, divide it into smaller containers so it cools more quickly, and get it into the refrigerator or freezer promptly. Safe food handling recommendations advise meat broth, stock and gravy can be stored in the refrigerator for 3–4 days.

For the refrigerator, my go-to is glass Mason jars with sealing rings. I like them because they’re reusable, easy to label, and the tight seal helps protect the broth from air and other refrigerator odors while keeping it nice and fresh. I find that a good seal helps me extend my storage time, but don’t risk it!

If you aren’t going to use your broth within a few days, freeze it.

For the freezer, I love Souper Cubes. They’re designed for freezing food in convenient portions, so you can freeze your broth, pop out what you need, and leave the rest in the freezer. They come in several sizes, which is especially handy because not every recipe calls for the same amount of broth.

If you prefer to freeze your broth in glass jars, there are a few important things you need to know. I’ve covered all of those tips and tricks in my Food Storage Basics post, so be sure to have a look before you decide what containers to buy. 

When it comes to freezer storage, food safety guidelines recommend using frozen meat broth within 4–6 months.

One last tip: Label your containers with the date before they go into the freezer. Future-you will thank you!

Bone Broth Recipes

Chicken Bone Broth (be sure to use the giblets, etc. for nutrient density and flavor)
Fish Bone Broth
Beef Broth (lamb can be used too)
Instant Pot Bone Broth
Instant Pot Beef Bone Broth (my favorite!)
Veggie Bone Broth
Meat Stock
Turmeric Ginger Bone Broth Smoothie Bowl (check my coupons for up to 35% off the collagen you need for this recipe)
Blueberry Cardamom Bone Broth Smoothie (omit cardamom unless you’ve reintroduced, and get a discount on protein powder here)

For More Bone Broth Recipes and ways to use it (soups, stews, smoothies and more) please use the group search function in my AIP Recipe Collection Facebook Group.

No Time for Bone Broth?

aiprecipecollection.com - SAVE 10% off EVERY brand, EVERY day! Stackable on Volume Discounts!Many people tell me they just don’t have time to make bone broth or they just can’t stand the whole process.  Fortunately, there are some options for quality bone broths that are AIP compliant.

Perfect Supplements carries powdered bone broth and so much more! Shop with my link and Code AIP10 to SAVE 10%  … AND MORE on VOLUME discounts of Perfect Brand products!

Wild Zora offers wildly DELICIOUS pre-made freeze-dried soups and stews! They don’t have plain bone broth but thought I’d recommend them here since so many that are prepping bone broth are using it to make their own homemade soups and stews or are looking for on-the-go convenience.
(Be sure to grab a coupon code from our coupons page.)

More pre-made bone broth suggestions on Amazon – USA / Canada / UK

 

This post contains affiliate links.  Click here to see what that means.

Tea for Two?

There’s been some confusion around tea and caffeine and the AIP, so let’s clear things up, shall we?

According to Autoimmune Wellness in their article What’s IN and What’s OUT on AIP? Answers to Tricky Foods (click the link to read the whole article):

Caffeinated Tea (Green or Black)

AIP is a coffee-free, but not a caffeine-free protocol. Green and black teas can be consumed, but due to the caffeine it’s generally advised to drink them earlier in the day and in moderation. It is also important to read labels carefully, as many teas have soy lecithin or other additives (or toxins) that are avoided on AIP. If adrenal fatigue is part of your health picture, you’ll want to work to eliminate caffeine entirely.

VERDICT: Caffeinated teas are elimination-phase legal.

Rooibos Tea — Again, rooibos is part of the larger legume family, but gets a pass. In this case, we only consume the leaves. It should be noted that, like carob, it is recommended to consume rooibos tea in moderation.

VERDICT: Rooibos tea is elimination-phase legal.

What About The Caffeine?

If this makes no sense to you because we have to give up coffee on the AIP, you’re likely thinking that coffee is given up because of its caffeine content – am I right? Well, it’s time to clear that misconception up too! Coffee is eliminated because it is a seed, not because of the caffeine, so be sure to read more about that in my post “Kicking the Coffee Habit.”

Still Confused?

If you’re still a little overwhelmed by all this, the best bet is to stick to true herbal teas that are derived from leaves or flowers instead of seeds and pods – think peppermint, chamomile, spearmint, lavender, etc. Ginger is a great option if it’s truly made from ginger and not flavors – in fact, quality and ingredients are important, so keep reading!

There are several recipes to make your own herbal teas from scratch (not difficult at all) posted in our Facebook Group – just try the search feature there – search tea or herbal tea.

What Brands Are Best?

Immune Supporting Pique Tea, Coupon Code, AIP Recipe CollectionAs mentioned above you’ll need to watch ingredient lists, and you’ll want to search for the best clean brands of tea on the market. It’s difficult for me to include a list for you as companies can change their products at any given time, but I try to keep my AIP Amazon Storefronts  upto date – USA / Canada / UK  

Pique Tea is a very well respected brand that prides themselves on the highest quality teas – you can read my post about Pique Tea here and how it fits into your AIP healing journey, or shop directly with our affiliate link by clicking here.

As always, the onus is on you to do a little research so you avoid GMO products and pesticide laden products – some use cornstarch in their bags and some contain soy and “natural” or artificial flavors – these are ingredients to stay clear of! Watch for certified organic products and check for sneaky non AIP ingredients and spices.


Chocolate – a topic near and dear to my chocolate-covered heart. 

For some, giving up coffee would be tough, for me, it was chocolate. Thankfully, I didn’t have to part with it forever — and maybe that bit of hope will be enough to get you through the AIP elimination stage too!

Things to Remember:

  • The AIP Core Elimination phase isn’t forever — reintroductions are part of the process, so take your time, but remember: for the love of chocolate, learn the AIP rules!!
  • Not everyone reacts to chocolate the same way! While dark chocolate is often hailed as a health food, some people (like me) react very badly to it. Strangely, I’m okay with chocolates that have a lower cacao content. Go figure! That brings me to my second point: AIP is meant to be personalized. Work carefully and intentionally toward reintroductions when the time comes, and make sure your AIP journey is truly customized to your body’s needs.

Modified AIP Elimination Option:

In January 2024, a Modified version of the AIP elimination phase was introduced. This optional modification allows for the inclusion of certain foods, including chocolate, during the elimination stage.

While this might sound like a tempting option, I encourage you to consider starting with the full Core Elimination phase if it’s accessible to you. Doing so will give you a solid baseline to track your body’s reactions to foods, and provide your body with the time it needs to rest and recover before you reintroduce any foods.

That said, choosing between the Core or Modified elimination phases depends largely on your individual health needs. If you have digestive issues or compromised gut health, the Core Elimination phase may be a better starting point. Always consult with your healthcare practitioner to determine the best approach for you.

For more information about the Modified AIP, click here. To learn about the differences between Core and Modified AIP, click here.

Chocolate – Friend or Foe?

According to the Paleo Mom, there’s no scientific evidence linking nut or seed consumption to autoimmunity. However, they’re on the AIP “no-no” list because they can be difficult to digest, and digestive issues are common for those with autoimmune conditions.

So, if you’re following AIP, eliminate cocoa for at least 30 days (or anywhere from 30-90 days depending on your unique journey). After that, try reintroducing it to see if it’s something your body tolerates. And if you’re missing the taste of chocolate during that period, carob can be a helpful AIP alternative! But remember… this doesn’t mean you should go CRAZY with chocolate after those days are up, folks!

I highly recommend reading more about chocolate in this must-read article by Eileen Laird over at Phoenix Helix, “Chocolate – Friend or Foe?” [click here]. It takes a deep dive into whether chocolate is beneficial or harmful within healing diets like AIP.

IMPORTANT: Not all chocolate is created equal. When you’re ready to reintroduce, this article will guide you on selecting the best options. And of course, as always, moderation is the key to keeping your body happy and healthy.

The Alternative

Life without chocolate doesn’t have to be all that bad. Let me introduce you to the best alternative — one I’ve grown to absolutely love: Carob!

I can already hear the nay-sayers, but trust me — I remember carob bars from my childhood, and let’s just say they didn’t leave a great impression. But real carob is nothing like that! When you use it right, I think you’ll come to love it too. It’s delicious! In fact, I’ve even chosen carob over reintroduced cocoa in some recipes!

If you’re in the elimination phase of AIP, or if chocolate doesn’t sit well with you, toasted carob is a great option! Seriously, it’s not so bad — I’ve found amazing carob recipes that I regularly serve to non-AIP folks, and they have no idea they’re not eating chocolate!

You’ll find lots of great carob recipes in our Facebook Group – just use the search function in the group and enjoy your carob in moderation.

Looking for quality carob or cocoa and cacao if you’re started reintroductions? Visit our Food Sourcing page for these and so much more!

This post contains affiliate links.  Click here to see what that means.

When you first start out on the AIP it might feel like every recipe contains coconut in one iteration or another. So, what’s the deal? Is it compliant? Is it a nut? Why do so many people seem to be sensitive to it? And what if I’m sensitive to it? To debunk on the confusion on the topic, here’s a little Coconut 101 for you. 

What’s The Deal With Coconut?

First of all, coconut is not a nut, it’s a “drupe,” and it does not seem to have the same reactive properties of tree nuts. That said, however, always check with your doctor or allergist if you have a tree nut allergy.

While coconut has many amazing health benefits and lots of beauty uses, it may not be for everyone. As with all foods and ingredients you consume on the AIP, I highly recommend you keep track of what you consume and any reactions/sensitivities you may experience. It is never advisable to consume anything that you body reacts negatively to, no matter how “healthy” that food may be in general. While I won’t go into the details behind sensitivities to coconut, in general, it contains high amounts of inulin fiber and is considered a food high in FODMAPs – highly fermentable and can cause problems for those with digestive issues or bacterial overgrowth.

If you experience coconut sensitivity, it can also sometimes be an issue of overconsumption (too much over time or too much of one thing at one time – I’ve experienced this with coconut milk). It also may be a case of being sensitive to one product and not another – for example some react to coconut milk but not coconut flour or coconut oil or coconut sugar or coconut aminos, etc.. So, be mindful not to completely write off coconut products as they do appear in a lot of recipes. If you are reactive and need to stay away from coconut, don’t despair! While it feels like EVERY recipe on the AIP has coconut in it, that’s simply because your brain is now focusing on something you can’t have. My AIP Recipe Collection Facebook Group at the time of writing this has over 800 coconut free recipes posted and it’s growing every week – click here to join us.

Coconut Ingredients 

Since a LOT of AIP recipes call for a variety of ingredients derived from the mighty coconut, it’s a good idea to familiarize yourself with them and their uses so you don’t get confused along the way – I’ll admit, it can get confusing sometimes!

Below are descriptions of the many coconut products on the market. Note that when you see an ingredient name below showing in green, this is a linked the product online at Amazon.com (USA) to help make things simple for you. If you’re in the USA, Canada or the UK I have separate AIP Shops set up for you on Amazon – everything is categorized and YES – there’s a coconut section – click the appropriate country link to be redirected. 

Coconut Milk/Cream

Before we dive into this one, first let me be clear, whenever we’re talking about coconut milk on the AIP it’s to be additive free – water and coconut only as ingredients. That rules out all of the “coconut beverages” you see in the supermarket refrigerator department and even some of the shelf-stable options – most of these “beverages” are full of ingredients you can’t pronounce, gums and emulsifiers.

So, which brand of coconut milk do I recommend?  That has to be one of the biggest questions in the AIP world! The best advice I can give for choosing coconut milk is that it should contain NOTHING but coconut and water – no other additives or ingredients.  BEWARE, while a brand of coconut milk may claim to be “organic” that does not indicate it’s additive free –  it could very well contain emulsifiers like guar gum, xantham gum or other additives which can harm the gut microbiome, which is why these are to be avoided on the autoimmune protocol … so always watch those ingredient lists folks!

While I will try to keep this list of AIP compliant coconut milk and cream up to date, be sure to double check the ingredients before you buy, because sometimes companies change their ingredients. (The links below are for Amazon USA – click the appropriate link here for your area – there are more available than what you see below – USA, Canada or the UK)

COCONUT MILK:

Aroy-D – in the Tetra Pack only! While this one is the MOST recommended by AIP recipe creators, REALLY watch this one – they’ve been suspect for a while and SOME of their products are cropping up that are NOT compliant)
Natural Value
Native Forest
Trader Joe’s
Cha’s is a great one in Canada

COCONUT CREAM:

Aroy-D
Let’s Do Organic
Trader Joe’s
Cha’s is a great one in Canada

COCONUT MILK POWDER:

With all of the additives showing up in coconut milk these days, coconut milk powder may be a better, safer and easier option – watch labels on this one – some are quite simply dehydrated coconut milk while others contain additives. 

Coconut Milk Powder

DIY  COCONUT MILK RECIPES:

Coconut milk is quite simply coconut meat blended with water and strained, so it’s easy to make yourself. DIY coconut milk is also the best way to ensure your coconut milk is compliant, so if you have time, why not give it a try!

Milk Options for the AIP
Creamy Coconut Milk
Homemade Coconut Milk

Cream / Creamed Coconut / Coconut Butter or Manna

Coconut Cream vs. Creamed Coconut – this is one that can be confusing in some recipes. Occasionally recipe creators refer to the ingredient by the wrong term, so be careful and consider the purpose/use in the recipe.

Coconut Cream – This is the fraction from coconut milk that separates out when a can of coconut milk without emulsifiers is allowed to sit still or is refrigerated for a while (TIP – I keep a can of coconut milk in the fridge so that when a recipe calls for coconut cream I have a can at the ready – the cream separates better when cold). The cream rises to the top and separates from the milk. It’s different from coconut butter because it’s been strained and contains no coconut fiber, so it’s not as thick as a butter.

Coconut Butter, Manna, and Cream Concentrate/Creamed Coconut are the same thing and can be used interchangeably. These coconut products are the result of dried coconut meat being ground into a very fine pulp resulting in a buttery texture. It can be used in place of nut butters and is often used in AIP baked goods and icing or frosting.

Penny Pincher Note:  Creamed coconut concentrate is typically less expensive to buy than the butter or manna. The beauty of creamed coconut is that it usually comes in smaller packets and therefore can be easier to use  The small plastic packet is easily warmed in a bowl of water and you massage it to usable consistency (I find coconut butter to be a real pain in the butt to get it mixed properly and it never stays that way – typically it comes in a jar and is solidified – the upper translucent layer being oil and the lower opaque layer being coconut meat – you will need to warm it and mix thoroughly before use. So, don’t be fooled if you get a jar and think it’s just coconut oil – I thought it was when I first bought it because it was in a dark jar and I didn’t know it was separated … silly me!).

This is the brand I use (Grace) – it’s nothing but creamed coconut as the ingredient and it’s easy to find – even in stores like Walmart. If you’re having trouble finding it – try the international foods section – it’s often used in Indian dishes.

You can also make your own, but note that it will never be quite as smooth as a commercially produced option. you will also need to make sure you have a very powerful food processor and keep an eye on it because you could burn out your motor. You can find recipes for DIY Coconut Butter in my AIP Recipe Collection Facebook Group.

Coconut Milk Yogurt/Kefir

Coconut yogurt and kefir are similar in nature – both start with coconut milk and go through a fermentation process – one with probiotics or yogurt starter and the other with kefir starter grains. Coconut kefir is thinner in consistency than yogurt.

At its simplest, coconut yogurt, or coconut milk yogurt, should have basically two ingredients: full fat coconut milk, and active probiotics.  While you may be fortunate enough to find an AIP compliant coconut yogurt on the market, more often than not, you’ll need to make your own (you can find recipes for making your own in the AIP Recipe Collection Facebook Group, but from what I’m told it can be tricky – so TRY THIS fool-proof recipe). Some folks suggest that making your own coconut milk yogurt is most successful if you use a yogurt maker, while others suggest an Instant Pot (most of the latest models have a yogurt setting, so watch for that) – be sure to read the various reviews in the group before you decide which method you feel is best for you. At minimum however, you will require probiotic capsules (be mindful that not all probiotics are suitable for everyone – consult your natural practitioner to ensure you’re using what’s right for you) or a recipe may call for a non-dairy yogurt starter culture.

IMPORTANT NOTE:  As with all things fermented, despite the “super-food” status they’ve been granted, they are NOT for everyone! Those dealing with certain digestive issues, mold implications, SIBO, Candida, etc. may do best to avoid these all together (at least for a time).

Coconut Oil

Coconut oil is the pure fat from the meat of the coconut and comes in several different varieties based on which processing method was used to extract it. The two basic varieties you’ll run into are refined  and virgin – I personally choose virgin (unrefined), as I don’t mind the coco-nutty flavor. If you don’t care for the flavor, you might want to try refined – you can read up on the differences here – Should we choose Virgin or Refined?

Coconut Aminos

Coconut aminos are made from the sap of coconut trees and is the most common replacement for soy sauce in AIP recipes. I use this brand.

Coconut Flakes/Shreds/Chips

Shredded, Flaked, and Chipped coconut are all made from the dried meat of a coconut. You’ll find these ingredients commonly called for in AIP baked goods, granola, to make coconut butter or coconut milk, or simply eaten as a snack or garnish.

Coconut Flour

Coconut flour is commonly used in AIP baking and is simply dried coconut meat that’s been finely ground, still having the fiber intact. The fiber in coconut flour makes if extremely absorbent and in turn it makes baked goods very dry, meaning you really need to stick to AIP baking recipes and not try making untested substitutions.

Coconut Vinegar

Coconut vinegar is made by fermenting coconut water or coconut sap. It has a slightly milder taste than apple cider vinegar and can be used in AIP cooking and things like salad dressings and marinades.

Coconut Water

Coconut water is the liquid, or water, drained out of a fresh, young coconut and it contains carbohydrates and electrolytes, has a low sugar and high nutrient content which makes it a great replacement for sports drinks or just staying hydrated when you’re on the AIP.

Coconut Nectar/Crystals/Sugar

Coconut nectar, crystals and sugar are all natural sweeteners derived from coconuts. Natural or not, sugars are sugars and we need to use these in moderation on our AIP healing journey. You can learn more about natural sweeteners in our dedicated post – click here.

Does It Matter if We Choose Virgin or Refined Coconut Oil?

I’ve found that some don’t like to use coconut oil in their AIP cooking and baking because it adds “coconut” flavor to their dish.  While I don’t mind it, I know that it could be a factor in some of the things we make.  That said, some prefer refined coconut oil because it’s flavorless.

When I first learned about flavorless coconut oil I immediately rejected it, because what kind of voodoo has to take place to make coconut oil flavorless?  I figured for a certainty that it wouldn’t be AIP compliant and therefore avoided it like the plague.

As it turns out, this is not necessarily the case, but you do need to educate yourself so you are sure to buy only the best products that are indeed AIP compliant.  Read more in the resources below.

Virgin vs. Refined Coconut Oil – 5 Things You Need to Know  – This article is written by Nutiva, a reputable brand (note that their coconut oil with butter flavor is not AIP compliant).

Coconut Oil is AMAZING, But Only If You Buy the Right Kind: Here’s What to Look For – This is a SHORT version that explains the differences

What Type of Coconut Oil is Best? How to Choose a Coconut Oil – This INDEPTH version will tell you EVERYTHING you want to know about coconut oil, which is best and how to use it.

Is it possible to do the AIP on a budget?

I won’t lie, it’s a challenge, and you have to choose your battles when you’re doing the AIP and trying to stick to a budget.

My number one piece of advice for all things AIP … KEEP IT SIMPLE!

Don’t try to get fancy with complicated AIP Recipes, baking, treats and using specialty ingredients.

Since there are already great articles on this topic I won’t reinvent the wheel, but in a nutshell concentrate on simple meat and veggies with a focus on nutrient density. Prioritize (choose organic ingredients for the worst offenders – click here for the EWG dirty dozen and clean fifteen food list – but it’s not the end of the world if you can’t afford it), meal plan (check out the best app for those on a healing AIP diet – click here for my review of the RealPlans app – it’ll help you schedule leftovers and choose recipes using minimal ingredients), batch cook and/or cook extras for left overs and avoid food waste. If you have a small yard or a balcony you can even consider growing some of your own food (leafy greens like lettuce, kale, chard and herbs are easy to grow in the smallest of spaces).

Check out the following resources and learn that budgetary restrictions really don’t need to cramp your style on the AIP.

Looking for AIP ingredients?  Visit our Food Sourcing page for reliable AIP shops.

Looking to save money? Of course you are ~ Grab some coupons here!

Want to try meal-planning but not sure where to start? Try this 10-day meal plan challenge for FREE!

Like a good book? Check out “Dinner for a Dollar”an 11-step system that will help transform your food life. It’ll slash the amount of time, money and energy you spend preparing nutritious, delicious, whole food – even when you’re on an allergy friendly-diet. Buy it on Amazon in my AIP Storefronts – USA / Canada / UK

Great Resources from Autoimmune Wellness

Part I: Three Tips for Eating AIP on a Budget 
Part II: Five More Tips for Eating AIP on a Budget
Part III: Budgeting Tips for the AIP
Accessible AIP: When a Healing Diet Isn’t in Your Budget
AIP is a Plant-Based Protocol
Sourcing AIP Food 101 – Favorite tips for sourcing the highest quality ingredients for the best price
Food Storage Basics – Tips so you don’t waste precious AIP ingredients
PODCAST:  Food Budgeting & Prioritizing

Other Resources

5 Ways to Save Money on the AIP