This post contains affiliate links. Click here to see what that means.
Sleep … sometimes the struggle is real!
Prior to starting my collection of autoimmune diseases, sleep was one of the things I was best at – I slept like a baby! Unfortunately, now I can relate all too well to those with insomnia and sleep disturbances, and have had more than my share of sleepless nights.
Sadly, insomnia and sleep debt is more than just an annoyance. Lack of sleep affects your circadian rhythm, disrupts the production of cortisol and melatonin, which in turn messes with your gut microbiome and autoimmune health.
If you’re caught in the endless cycle of sleepless nights, inflammation and autoimmune flares, you may be at the end of your rope.
How Much Sleep Do We Really Need on the AIP?
Shockingly, just TWO nights of poor quality sleep, or not enough sleep, can contribute to changes in your gut health, allowing the bad bugs (inflammatory bacteria) to get the upper hand over the good guys (healthy microbes). Left unchecked, poor sleep habits and sleep debt can cause a host of problems like digestive upset, diarrhea, mood changes, brain fog, leaky gut/gut permeability, increased inflammation and so much more.
It’s recommended that we get to bed by 10 pm for optimal rest and recovery, and that we get 7 to 10 hours of sleep per night (for autoimmune sufferers it might be 9-10 hours or even 12 hours every night to heal).
Quick Sleep Tips for Better Autoimmune Rest:
 Good sleep starts in the morning – yes, the morning!
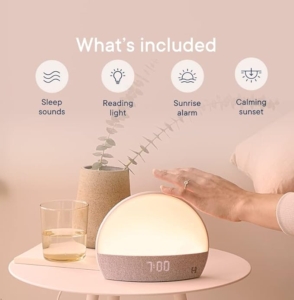
- Ditch the traditional alarm clock and try a wake light. Waking up to a jarring noise (even if it’s your favorite radio station) is very physiologically stressful, and can impact cortisol levels.
- Aim to get 5-15 minutes of sun exposure, preferably outdoors but a window will suffice if needed. I’ve also found using a light therapy box helpful.
- Use Red Light Therapy for daily wellness – I recommend a device like the Kala Redlight. A 10–20 minute session within the first hour of waking is ideal for signaling your body that it’s time to be alert and supporting your circadian rhythm. Beyond that, red light can be used any time of day to support energy, reduce inflammation, ease muscle or joint discomfort, improve skin repair, and boost cellular vitality. It’s a gentle, non-invasive way to care for your body and overall wellness every day. (Use my link and get 15% off your purchase at Kala)
What you eat, drink and do during the day can help.
- During the day – avoid caffeinated beverages after 2 or 3pm. (If you’re on the AIP and trying to cut coffee and caffein, check out my post on “Kicking the Coffee Habit”)
- Add foods rich in magnesium to your diet, such as avocados, dark leafy greens, fatty fish like salmon, bananas (almonds and sesame seeds if you’ve reintroduced).
- Just 30 minutes of bright light exposure during the daylight hours can help regulate our circadian rhythms, and improve your sleep-wake cycles. Try eating lunch outside if your climate permits!
- Inactivity causes poor sleep – just 30 minutes of walking each day can improve your sleep.
- Harness the anti-inflammatory power of your mind! Learn and implement mind-body techniques to help with sleep and so much more – grab your copy of this amazing book “The Healing Mindset.”
- Consider taking a magnesium supplement with dinner (consult with your medical professional to see if this is right for you).
- Be active and social during the day rather than at night
- Eating a serving of starch with your dinner, 4-5 hours before bedtime, can improve sleep quality. Try my Bacon Mashed White Sweet Potatoes recipe.
- Enjoy a cup of chamomile or banana peel tea (make sure your bananas are organic) an hour or so before bed.
Cue the Zzzz’s – what you do before bed matters!
- Our bodies love routine – keep a consistent schedule – waking and getting to bed at the same time each day is best.
- Learn to relax and avoid overstimulation before bedtime, and turn off screens 30 minutes prior to going to bed. If you really struggle with avoiding screen time before bed, consider some blue-blocking glasses or a blue blocking app on your devices.
- Wind down with a warm bath. Soaking in an epsom salt bath can help relieve stress and anxiety, and ease muscle aches and inflammation.
- Check out Ancient Minerals (or here on Amazon) for adding magnesium transdermally (Fun Fact: magnesium oil makes a great natural deodorant).
- Stretching isn’t reserved for mornings – try a few gentle bedtime yoga poses/stretches before climbing into bed.
- Keep the temperature in your bedroom cool. Good ventilation is key but be careful to avoid drafts.
- Be strict about what you do in bed. Avoid watching TV, surfing/scrolling on our devices and even reading. When you climb into bed and lie down, this should be the cue for our bodies and minds to sleep, not rev up for the next episode of our favorite show or the next juicy chapter of a book.
- White noise machines or a quiet fan can be great tools for blocking noise from our environment, creating a calm environment
- Aromatherapy can help create a calming atmosphere for your evening routines. In addition to chamomile, scents like lavender, cedarwood, and jasmine have been shown to lower heart rate, decrease blood pressure, and promote better sleep efficiency. Using my diffuser (I love GreenAir brand) is one of the favourite parts of my sleep routine.
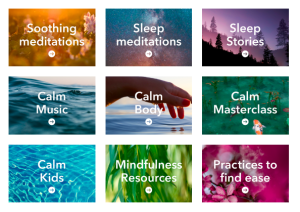
- Meditation, mindfulness and gratitude can help reduce stress, and stress-reduction is critical to sleep quality. There are lots of apps available to help you get into the routine. Calm and Headspace are popular paid options, but Insight Timer is a quality option you can try for FREE. See below for some amazing
- The one foot rule – make sure your bedroom as dark as possible – if you can see your hand one foot away from your face, it’s not dark enough. Consider using a sleep mask or black-out curtains.
- Try vibrotactile technology! I’ve recently been testing these drug-free, toxin-free REM Sleep Patches, and the results are seriously impressive. While they don’t help you get to sleep, they help you achieve deeper, more restorative sleep. Learn more about this simple technology here.
Speaking of routine and sleep disruptions …
🌞 How Daylight Saving Time Impacts Your Sleep
Whether we’re springing forward or falling back, the time change can throw our bodies for a loop — especially if you’re already struggling with autoimmune fatigue or insomnia. Even a one-hour shift can disrupt your circadian rhythm, making it harder to fall asleep, wake up, and feel alert during the day.
According to the Sleep Foundation, these sudden changes in light exposure and daily schedule can affect your hormones, mood, and metabolism. Your body’s internal clock needs time to adjust, and that can take several days (sometimes up to a week).
Here are a few quick tips to help your body adapt more smoothly to Daylight Saving Time — in either direction:
When You Spring Forward (Lose an Hour of Sleep)
- Start adjusting early: Go to bed and wake up 15–20 minutes earlier each day for 3–4 days before the change.
- Get morning sunlight: Exposure to natural light soon after waking helps reset your circadian rhythm faster.
- Avoid naps: They might feel tempting, but skipping them helps your body adapt to the new bedtime more easily.
- Keep your schedule steady: Consistency helps your body recalibrate more quickly.
When You Fall Back (Gain an Hour of Sleep)
- Stick to your usual wake time: Sleeping in can actually make it harder to adjust.
- Use the extra morning light: Take advantage of the earlier sunrise to help your internal clock reset naturally.
- Wind down gradually: Keep your evening routine consistent — use calming cues like tea, aromatherapy, or a warm bath.
- Avoid heavy meals or caffeine late in the day: Especially important while your body adjusts to the new timing.
If you find yourself struggling for more than a few nights after the time change, revisit your sleep hygiene — light exposure, bedtime routine, and meal timing can make a huge difference.
When All Else Fails: Natural Sleep Support Ideas
 Despite the best laid plans, sometimes I just can’t sleep (usually because I didn’t follow some of the tips above) or I get to sleep only to be woken up by my snoring husband or a hot flash! So what then?
I’ve found there’s no point staying in bed, tossing and turning, staring at the ceiling, checking the clock. In fact, it’s said if you don’t fall asleep within 20 to 30 minutes you should get out of bed – you don’t want to associate feeling anxious and restless with the bed itself because that can lead to insomnia.
If you’re tossing because you’re not tired, get out of bed and read a chapter or two of a favourite book – try avoiding reading on a device or use blue-blocking glasses or a blue blocking app. If you’re tired and really wishing you could get some Zzzz’s, I recommend a sleep story or guided meditation (if you share your bed, you’ll want to get out of bed so you don’t disturb your partner).
My sure fire way to get back to sleep is using my acupressure mat (it doesn’t have to be expensive – buy what you can afford)! I was skeptical about the benefits and effects of using this simple tool, but it really does seem to calm the parasympathetic nervous system and help me relax and fall asleep.
LOOKING for More AIP Lifestyle Tools?
Visit my Categorized AIP Amazon Store Fronts – USA / Canada / UK
Hand-in-hand with my mat, I love to listen to a sleep story – they work so well, I don’t think I’ve ever actually heard one from beginning to end! Sometimes I realize I’m drifting off to sleep so I go back to bed, but other times I end up completely out for the count and sleep right through.
There are lots of sleep story options out there in various apps, and I’ve tried a few, but my very favourite story is “Wonder” – read by Matthew McConaughey – check it out along with a bunch of amazing FREE resources Calm provided when the pandemic hit.
More References:
Sleep: Why It’s Important For Those With Autoimmune Disease, and How To Get More Of It.


 Ingredient FAQs


