
Food Storage 101: Batch Cooking, Glass Safety & Toxin-Free Tools
This post contains affiliate links. Click here to see what that means.
When you’re on the AIP, you’re likely doing a lot more cooking than usual. Whether you’re batch cooking or meal prepping for the week or simply saving leftovers from dinner, what’s the best way to store all of this delicious, healing food? Does it matter what containers we use? Need the 4-1-1 on food storage basics? You’ve come to the right place!
Since we’re trying to live a toxin-free life on the AIP to give our bodies the fighting chance they need to heal, it’s a good idea to consider what you’re using for food storage. There are a lot of opinions out there about plastics, BPA-free options, silicone, and more (read more about why we should avoid plastics here). For me, I kick it old school as much as possible: zero waste, sustainable living, loveable, reusable glass, and non-toxic alternatives!
Storage Planning Tips
-
Pace yourself: Before there’s food to be stored, there’s food to prep, so I offer this tip from personal experience. Extra cooking can be exhausting—especially in the beginning when you’re really not feeling well. So, my top tip is to try to pick days when you’re feeling up to making extra. Better yet, have a friend or family member jump in to help tag-team it. You can work together to create a bunch of delicious options so that you both go home with food to stock your fridge and freezer. Many hands make light work!
-
Don’t outpace your storage space: I’ve done this before when feeling super ambitious: I cooked way more than I needed for a week or two and found my fridge stuffed to the brim. Evaluate the space you have in both your fridge and freezer before you start, and be sure to choose recipes that are freezer friendly if that’s where you plan to store them.
-
Have your containers ready: There’s nothing worse than finishing a big batch cook and then scrambling to find suitable food storage. If you can’t afford to buy new containers, save glass jars from store-bought items or check a local thrift store. If you score secondhand jars, your only investment will be buying new lids.

Choosing Your Non-Toxic Storage Tools
Glass is the gold standard for non-toxic food storage, but it isn’t your only option … especially when freezer space or shatter-risks come into play.
-
Glass Jars & Shallow Containers: The classic favorite. Glass jars are wonderful for single-portion liquids, while shallow glass dishes are ideal for solid meals (like shepherd’s pie or roasted root vegetables). Glass holds heat and cold well, but takes a few special precautions to freeze safely without cracking.
-
Quality Silicone Stand-Up Bags (e.g., Stasher): A flexible, leakproof, platinum-silicone alternative to plastic freezer bags. Perfect for flat-freezing “freezer-dump” meal prep ingredients, cooked meats, or roasted veggies to maximize vertical freezer space.
-
Silicone Trays & Portioners (e.g., Souper Cubes): Hands down the most versatile addition to an AIP kitchen! Food-grade silicone trays allow you to pre-freeze portioned amounts of bone broth, stews, purees, and pestos. They feature measured fill-lines (like 1/2 cup, 1 cup, or 2 cups) so you can easily pop out exact portions into longer-term storage without thawing a whole batch.
-
Stainless Steel Containers with Silicone Lids: Yes, stainless steel is a total game-changer for the freezer! Food-grade metal is 100% shatterproof, non-toxic, and lightweight. Because metal conducts cold quickly, food freezes faster—which reduces ice crystal formation and protects your food from freezer burn. It completely eliminates the fear of dropping a frozen container on the kitchen floor!
How to Safely Freeze in Glass Jars
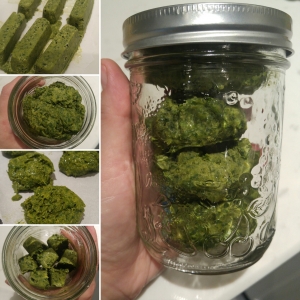
My favorite wide mouth jars with frozen pesto cubes!
Now, you may have heard horror stories of glass jars shattering in the freezer. I had heard stories too, but was always fortunate enough not to have any issues… leave enough space at the top of the jar for expansion and you’re good to go! Right? No … not always!
Eventually, my luck ran out, and tears were shed over bone broth lost. The truth is, at that point I was a newbie to all this and I was using the wrong jars. Even if you leave headspace, you can still have jars crack—not just during freezing, but even during the thawing process! My exposed quick-freezing coils didn’t help either, making thermal shock a real risk.
Fortunately for you, I’ve made the mistakes so you don’t have to!
-
Use Wide-Mouth, Straight-Sided Jars: Avoid tall, skinny jars or jars with “shoulders” (where the jar curves inward near the top). As liquid expands upward, curved shoulders trap the pressure and crack the glass.
-
Leave Room for Expansion: Fill jars only 3/4 full to ensure liquid has plenty of room to expand upward as it freezes.
-
Cool Completely First: NEVER put warm liquids straight into the freezer. Let cooked food cool completely on the counter, then chill it in the refrigerator overnight before moving it to the freezer.
-
Freeze Upright: Always freeze jars standing straight up.
-
Protect from Freezer Coils: If your upright freezer has bare cooling coils on the shelves, place your jars inside a shallow plastic bin as a barrier for a few hours or over night. This reduces thermal shock and catches spills if a jar ever does break.
-
Thaw Slow & Steady: NEVER try to thaw glass quickly or place frozen jars straight into hot water. Move frozen jars to the refrigerator 24 hours before you need them to thaw slowly and safely.
The Game-Changer Hack: Pre-Freezing & Souper Cubes
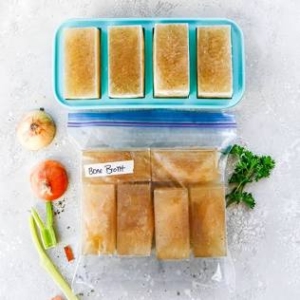
Souper Cubes make freezing bone broth souper easy!
If you want to eliminate the risk of cracking glass entirely, the pre-freezing method is the absolute best way to go!
Instead of pouring liquids directly into jars, pre-freeze your liquids in Souper Cubes trays first. Once frozen solid, pop the blocks out and transfer them into re-usable silicone Stasher bags – easy peasy!
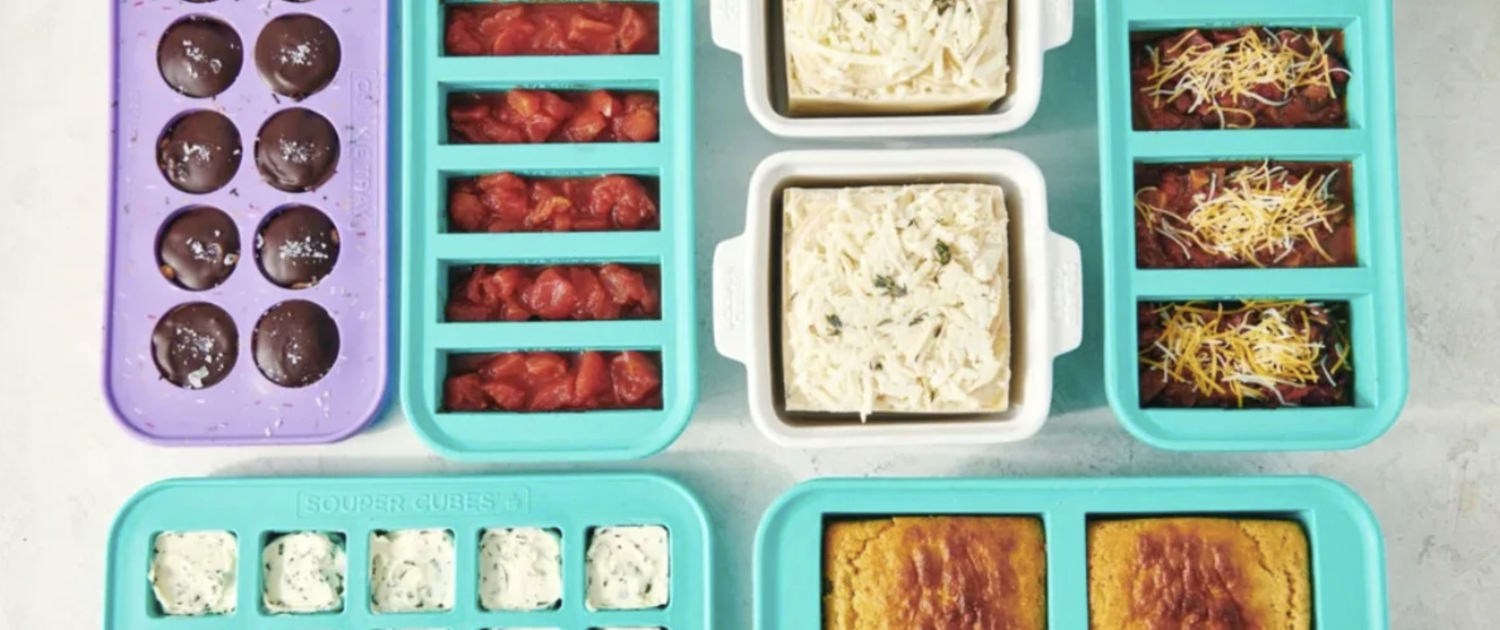
Souper Cubes are an absolute game-changer for AIP batch cooking – not just broths and soups, but all kinds of meal prep options:
-
Food-Grade & Toxin-Free: Made from 100% food-grade, BPA-free silicone with a sturdy rim so they don’t flop around when full.
-
Measured Fill Lines: They come in segment sizes like 1/2-cup, 1-cup, and 2-cup portions.
-
Portion Control: Think about how often you only need a single cup of bone broth for a quick pan sauce or a stir-fry! Pre-portioning means you never have to thaw a full quart jar just for a few spoonfuls.
 Preventing Freezer Burn
Freezer burn is caused by moisture loss and oxidation (exposure to air) in the freezer. It leads to ice crystals, shriveled produce, and tough, discolored meat. Boo to that!
-
Minimize Exposure to Air: Properly package your food before storing. For meat, poultry, and seafood, wrap it tightly in unbleached freezer paper or butcher paper first, then in a layer of foil, and place it in a freezer storage bag with all the air pressed out.
-
The Straw Trick: When using bags, zip them almost all the way closed, insert a straw to suck out the remaining air, then seal quickly!
-
Invest in Vacuum Sealing: If you buy meat in bulk, have a garden, or buy sales items, a vacuum sealer is a fantastic investment (look for BPA-free vacuum bags).
-
Keep Temperatures Steady: Avoid opening and closing the freezer door unnecessarily.
-
Rotate Inventory: Aim to use frozen foods within 2 to 4 months. Date your packages and practice “first in, first out.”
-
Rescuing Freezer-Burned Food: If your food gets a little freezer burn, don’t throw it out! It is still completely safe to eat. The texture might be slightly altered, so use it in forgiving dishes like soups, stews, sauces, or smoothies.
Storage Timelines & Food-Safety Guidelines
Since you know I’m not one for rewriting well-presented material when official resources exist, I’m simply going to direct you to the gold-standard charts!
Don’t Guess, Check!
Check the official FoodSafety.gov Cold Food Storage Chart—maintained jointly by the USDA, FDA, and CDC—for an exact itemized list of how long cooked meats, soups, and leftovers stay safe in the fridge and freezer.
Cheat Sheet!
If you prefer a printable cheat sheet to stick on your refrigerator door, download the FDA Refrigerator & Freezer Storage Guide. For quick lookups on specific ingredients on the go, the USDA’s FoodKeeper App is another amazing tool.
Generally Speaking:
As a general rule of thumb for batch cooking on the AIP, most cooked soups, stews, and meals are best enjoyed within 3 to 4 days in the fridge or within 2 to 3 months in the freezer for optimal flavor and quality.
AIP-Specific Guide:
This food storage article from Autoimmune Wellness covers shelf-life for everything from root veggies and fresh herbs to proteins. (One quick personal note: while this guide is super helpful, I disagree with their extended timeline for gelatin gummies. Because homemade gummies lack commercial preservatives, they tend to collect moisture and get moldy in the fridge quite quickly. I suggest eating homemade gummies within 3 to 5 days max, or keeping half the batch in the freezer!)
You Might Also Be Interested In:
Since life on the AIP can get a little “spendy” and we’re here making sure we store our food properly so we don’t waste any precious ingredients, you might also be interested in my post about Managing the AIP on a Budget.