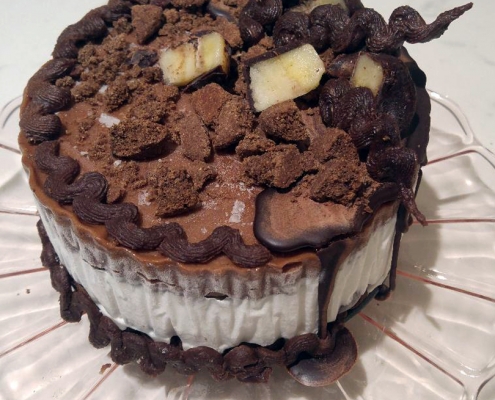
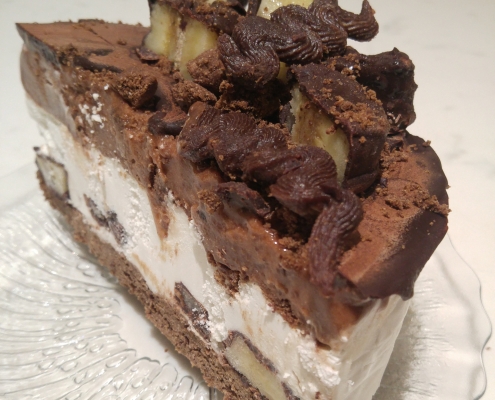
Frozen Chunky Chocolatey Monkey Cake
This post contains affiliate links. Click here to see what that means.
Okay, I’m not gonna lie to ya, this Frozen Chunky Chocolatey Monkey Cake is a bit of a project! BUT … despite the abundance of steps, it’s really pretty easy, and the work can be spread over a couple of days – OR- you can choose your level of difficulty and simplify it!
I went all out on the decorations, and it was a labor of love as we celebrated the end of an unprecedented school year for my nephew. It’s pretty impressive looking ice cream cake, and everyone, even the non-AIPers, loved it!
To be honest, I’ve tried to keep things as easy as possible without sacrificing the “WOW!” factor. There are only SIX ingredients plus the AIP compliant cookie mix that’s used for the cake base and decorations! (See below for more about this cookie mix or follow the link in the recipe to order!)
Since I’m not a pro recipe developer and I’ve never made an AIP ice cream cake before, I wasn’t sure if I would have enough to create one large cake or just a small one, so I opted to play it safe and created two smaller cakes instead.
In hindsight I was really glad I’d made two instead of one – it allowed me to have one perfectly decorated and ready to present to my guests and one pre-cut so I could avoid the stress of making sure my ice cream cake was thawed enough in advance.
And as if that wasn’t good enough, since we only ate one cake, I was able to safely store the other in a large freezer bag and have friends over for a nice treat more than a week later! Talk about an unexpected batch cooking victory!
Level of Difficulty
Don’t let all the ingredients and steps fool you, you can make this cake as complicated (you can add more layers and flavors if you want) or easy as you want it to be!
I went all out because it was a celebration, but you can still make this look impressive with one flavor of ice cream and some cookie chunks and basic chocolate shell drizzle. OR or don’t worry about layering it and swirl the two flavors together instead … anything goes!
I really do recommend the chocolate covered bananas though for the Chunky Chocolatey Monkey Cake theme – they’re so easy and you’ll fall in love with them! I’d even serve them as a stand alone dessert in the future – they were a huge hit! HINT: They keep really well in an air-tight container in the freezer and make a great treat when you need a little something!
Don’t have a spring-form pan or don’t want the hassles of trying to cut an ice cream cake? You can also make these into individual servings by using a muffin pan with parchment liners instead! Don’t have a muffin pan? Just buy some parchment liners and place them on a baking sheet and bake your cake base/cookies right in the liners.
Not into bananas or chocolate? Try different flavors of ice cream and decorate with freeze-dried or fresh fruit … the options are limited only by your imagination! You can find lots more ice cream recipes in the AIP Recipe Collection Facebook Group that will inspire you!
Have fun with it!
 Special Offer!
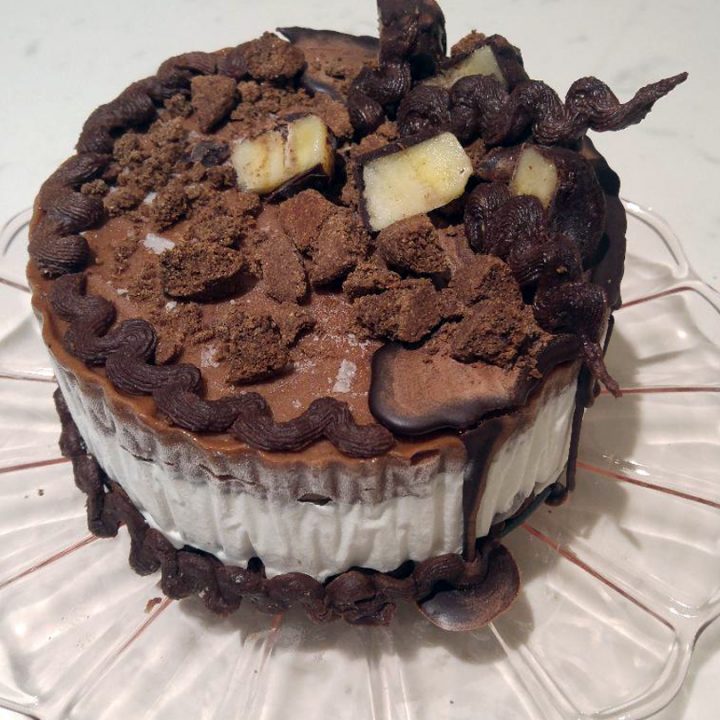
Frozen Chunky Chocolatey Monkey Cake
♥ RECIPE & IMAGE BY: AIPRecipeCollection.com ♥ This one's a labor of love, but I think it's totally worth it for the WOW factor alone .. never mind the fact that this ice cream cake is 100% AIP Elimination Stage Compliant!
Ingredients
Layer 1 - Cookie Base (also used as cookie crumble and decorations)
Layer 2 - Frozen Bananas
- 2 or 3 ripe bananas, peeled and frozen individually
Layer 3 - Dairy-Free Vanilla Ice Cream
- 2 cans full fat additive free coconut milk (13 1/2 ounces each)
- 4 Tbsp maple syrup
- 1 Tbsp quality organic vanilla extract
Layer 4 - Dairy-Free Chocolate Banana Ice Cream
- 4 Bananas, frozen
- 2 Tbsp roasted carob powder
Layer 5 - Chocolate Shell Drizzle
Decorations - Chocolate Covered Frozen Banana Bites
- 1 or 2 frozen banana, sliced approximately 1/4” thick
- 3 Tbsp coconut oil
- 2 Tbsp roasted carob powder
Optional Decorative Icing
- 1 large, ripe banana, mashed until very smooth
- 1 pkg coconut concentrate/coconut butter (141g or a little over 1/2 cup), completely softened
- 2 heaping spoons of roasted carob (approximately 2 tbsp - you will need to gauge this based on flavor and the size of your banana - you want a soft, smooth texture that will hold up to being piped)
Instructions
Layer 1 - The Cookie Base:
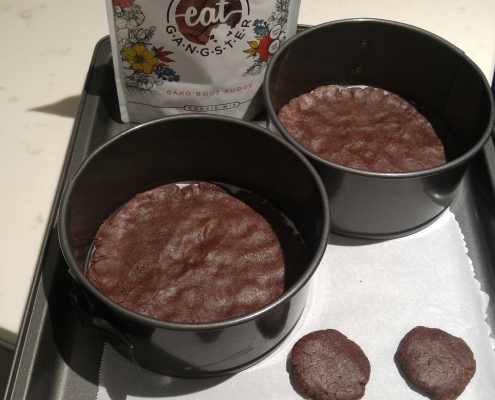
- Prepare the Eat Gangster Carob’Out Fudge Cookie Mix according to package directions.
- Line a small cookie sheet with parchment paper and line your spring-form cake pan or pans (either two 6-inch or one 10-inch) with a disc of parchment (I cut mine to the exact size of my pans).
- Once your cookie dough is ready to be worked with, split the ball of cookie dough in half. Use one half of the dough to make traditional cookies as directed on the package (these will be used as decoration elements) and use the other half of the dough to create a cookie base for your cake. If using two pans, split the dough in two. Roll the dough in your hands and start flattening it, then simply press it into your cake pan(s) so that it just reaches the edge – try to avoid having it touch the sides of the pan to ensure an easy release.
- Bake your cookies and the cake bases according to the package directions. Allow them to cool completely.
Layer 2 - Frozen Bananas
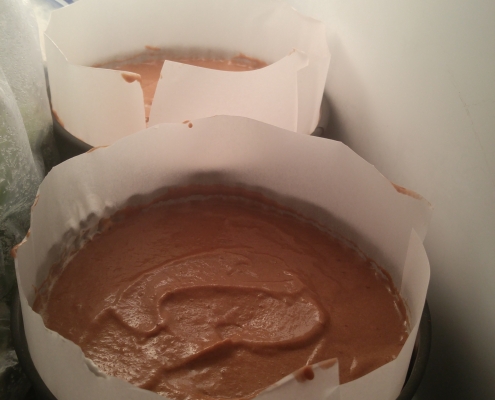
- Line the sides of your cake pan(s) with a ring of parchment paper to make releasing your cake a breeze.
- Slice the frozen bananas into 1/4" thick coin shapes. You'll need enough to create a single layer in the bottom of your pan(s).
TIP: I keep a supply of whole, ripe, peeled bananas individually wrapped in my freezer for use in smoothies or ice cream so I didn't even need to plan ahead! - Arrange the slices on top of the cooled cake bases and place them in the freezer.
Layer 3 - Dairy Free Vanilla Ice Cream
- In a large liquid measuring cup or bowl combine the vanilla ice cream ingredients until well blended and refrigerate until cold.
- Pour the chilled vanilla ice cream mixture into your ice cream maker and follow the manufacturer’s instructions for churning.
- When the ice cream is ready, pour or scoop it into your pan(s) and smooth with a spatula.
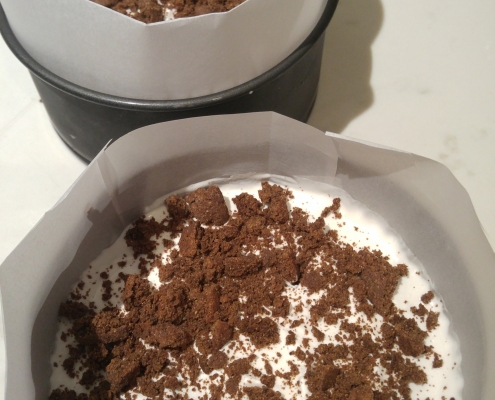
- Crumble a few of your prepared cookies on top of the vanilla ice cream layer and return it to the freezer until firm.
Decorations - Chocolate Covered Frozen Banana Bites
These can be made in advance and stored in an air-tight container a day or two in advance if you prefer.
- Line a plate, tray or storage containers with parchment paper – these will need to go in your freezer so make sure it’s a suitable size.
- Mix the carob and coconut oil until it is completely smooth.
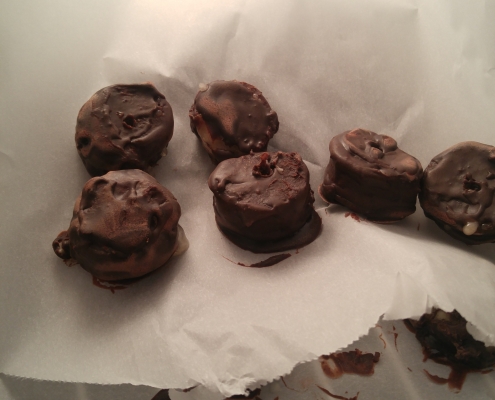
- Work quickly to coat the frozen banana slices with the chocolate shell mixture. I find it helpful to use a toothpick to dip and flip them and then move them to your prepared parchment.
- Work until all of your banana slices are chocolate covered. Store in
the freezer.
Optional Decorative Icing
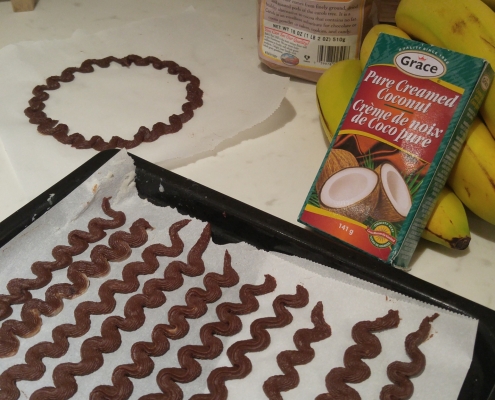
The optional decorations for this cake can be made, piped on parchment paper a day in advance and stored in an air-tight container in the fridge.
- Mix the three decoration ingredients together until very, very smooth. If you want white decorations, omit the carob but note that you may need to use less banana or more coconut concentrate so the decorations will be firm enough.
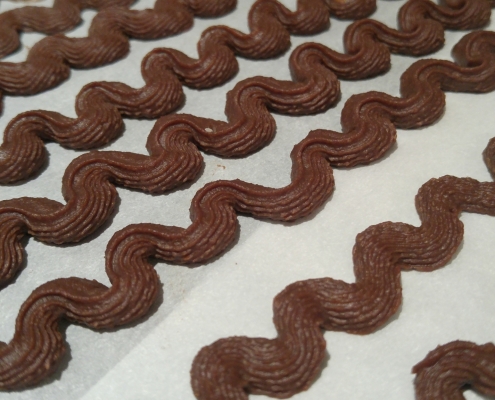
- Line a cookie sheet with parchment paper and pipe your icing into various shapes, designs and sizes. I found it best to use a large decorating tip.
- Place the decoration in the fridge until firm. If you won’t be using them until the next day, store them in an airtight container so they don’t dry out.
Layer 4 - Dairy Free Chocolate Banana Ice Cream
When your vanilla ice cream layer is firm you can begin this step.
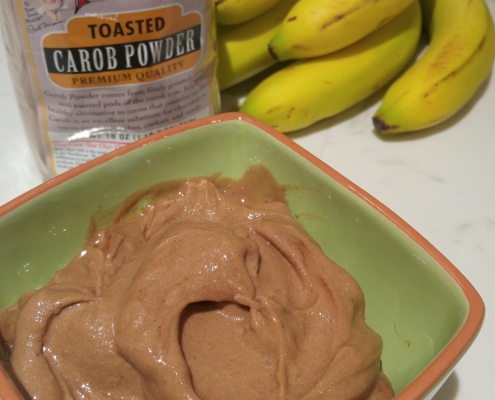
- Using a high speed blender, simply break the frozen bananas into small chunks and pulse to start breaking them up.
- Add the carob powder and blend on high speed until smooth, scraping the sides often.
- If your blender is struggling, allow the mixture to warm slightly and try again or add a teaspoon of water at a time and try blending again. Be careful not to add too much water.
- Spread the chocolate banana ice cream in the pan and return to the freezer until firm or overnight.
Decorating
When you're ready to put the final touches on your cake, prepare the chocolate shell drizzle
- Mix the carob and coconut oil until it is completely smooth.
- Remove your cake from the freezer, remove the spring form pan ring, place your cake on a cake plate and remove the parchment ring from the sides.
- Drizzle the chocolate shell over the cake or pour it along the edge and allow it to run down the sides. Be aware that it solidifies quickly so try not to pour too much in one spot or it will be too think and difficult to get a fork through to eat.
- If you’re using the optional decorative icing, remove it from the fridge and allow it to warm slightly while you continue.
- Continue decorating your cake by arranging the frozen chocolate covered banana bites on the top of your cake.
It looks nice to cut some in half. - Used some of the Carob’Out Fudge Cookies as decorations – beak some in chunks and crumble others so you have lots of different textures.
- If you’re using the optional decorative icing you’ll find once it has warmed up a little that it’s pliable and you can quite easily arrange it around the base of the cake. I’m no expert at icing so
pre-piping it onto parchment the day before I planned to serve the cake really took the stress out of the process. - Once you’re happy with the look of your cake, place it back in the freezer so everything freezes in place.
Serving
Remove your cake 15-20 mins prior to serving so that the ice cream softens a little.
Cutting an ice cream cake can be tricky. Warm a large knife by running it under hot water.
Rather than trying to cut all the way across the full diameter of the cake, insert the tip of the knife in the center of the cake and slowly press down.
Rinse and warm the knife and continue cutting into slices.
Enjoy! ♥
Leftovers can be stored in the freezer for several days or even a week in a Freezer-capable ZipLoc bag or airtight container if you have one suitably sized.
